How to integrate Twilio SMS with Flutter. Beginners Guide to Twilio & Flutter.
Table of contents
Introduction
Twilio is one of the best third-party APIs when it comes to adding SMS or Voice features to your mobile app. There are a few packages out there that make Twilio integration with Flutter super easy. Let's use one of those packages to integrate Flutter and Twilio.
We will break down the process into 3 simple steps. Setting up your Twilio account, Adding the Twilio package to Flutter, and implementing the code for integration.
Step 1
First of all, let's set up our new Twilio account. Go on Twilio's website. Create a new account or log in if you already have one. After doing this, you will be taken to your console.
- On the console, you will see a variety of things like toke, id, some account balance, etc. We are using a free version of Twilio for now. On new account creation, we will get $15 of credits.
- In the center portion of the console, you will see two fields namely Account SID and Auth Token. We will need those 2 items in our Flutter code.
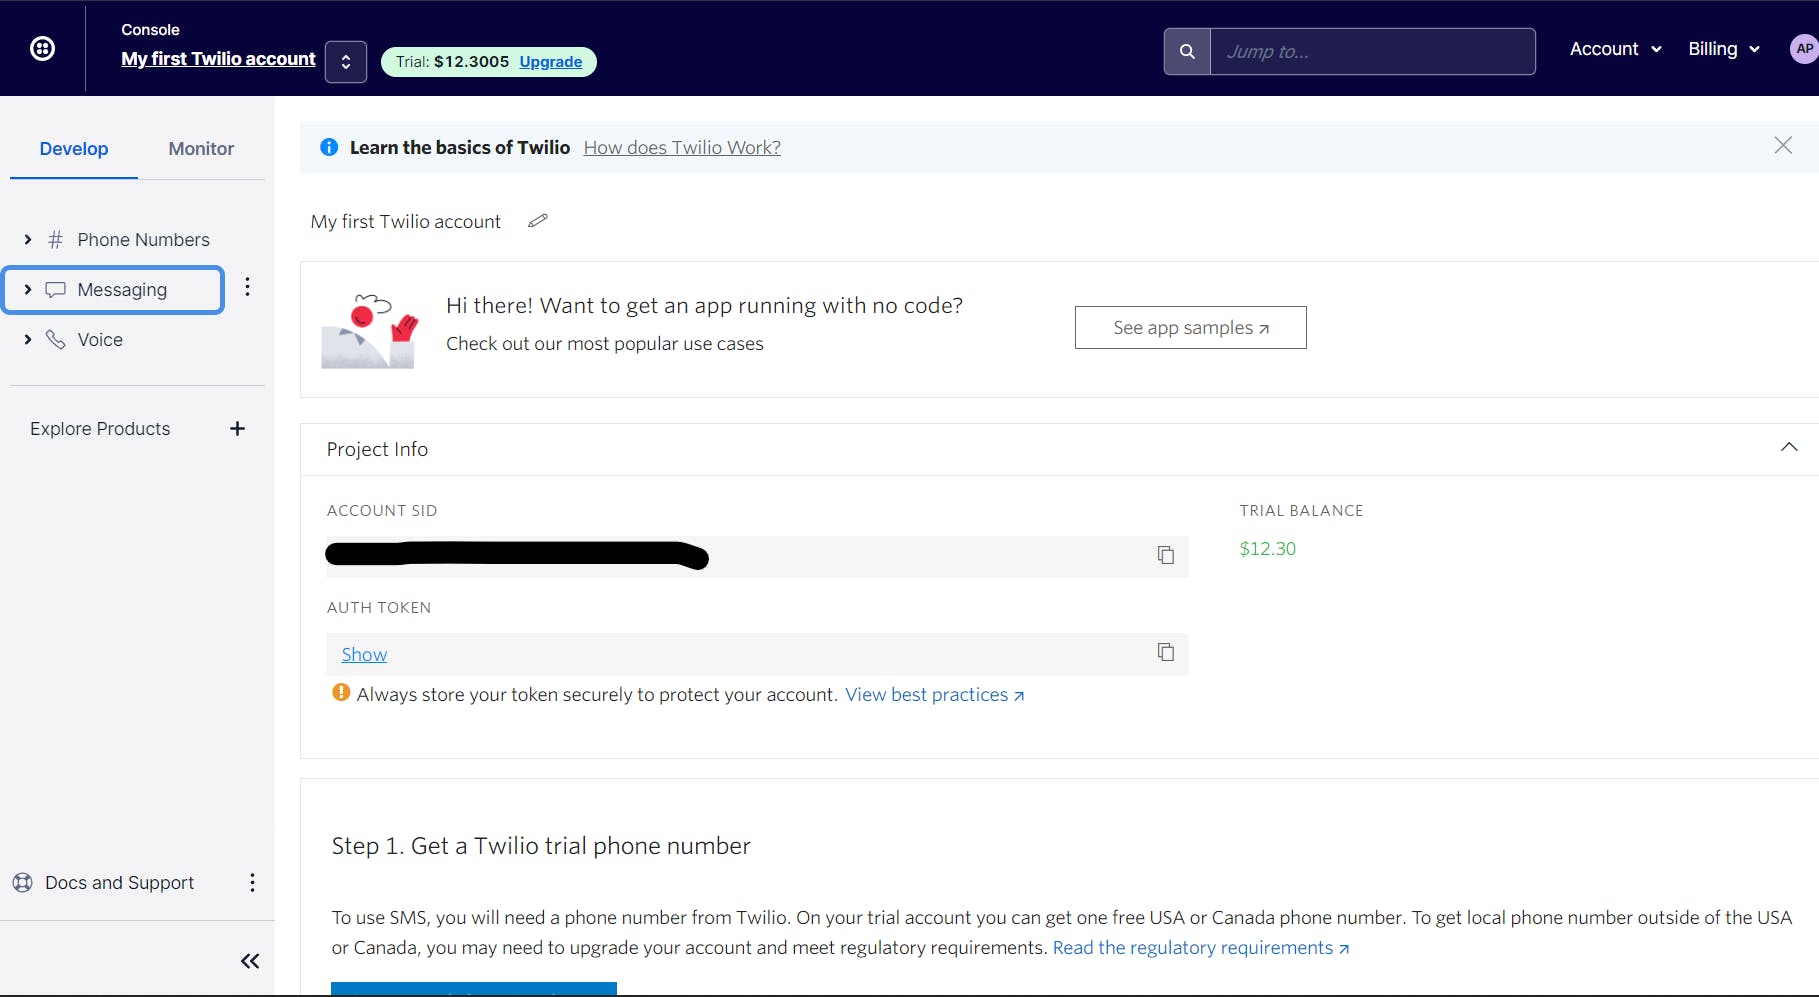
- We will also need a Twilio phone number from which we can send messages to other phone numbers. For that, just scroll down on the console and tap on the get a trial phone number button. It will show a small window of a phone number and ask if you want to save the number. Save it.
- Since we are using a free account, we will only be able to send messages to a verified Twilio number. Now how do we verify a number? It is very easy. Just follow these steps.
- On the left-hand side you can see a drawer with three toggles. Tap on Phone Number, then inside it tap on Manage, then inside it tap on Verified Called IDs. You will now reach a page that looks something like this.
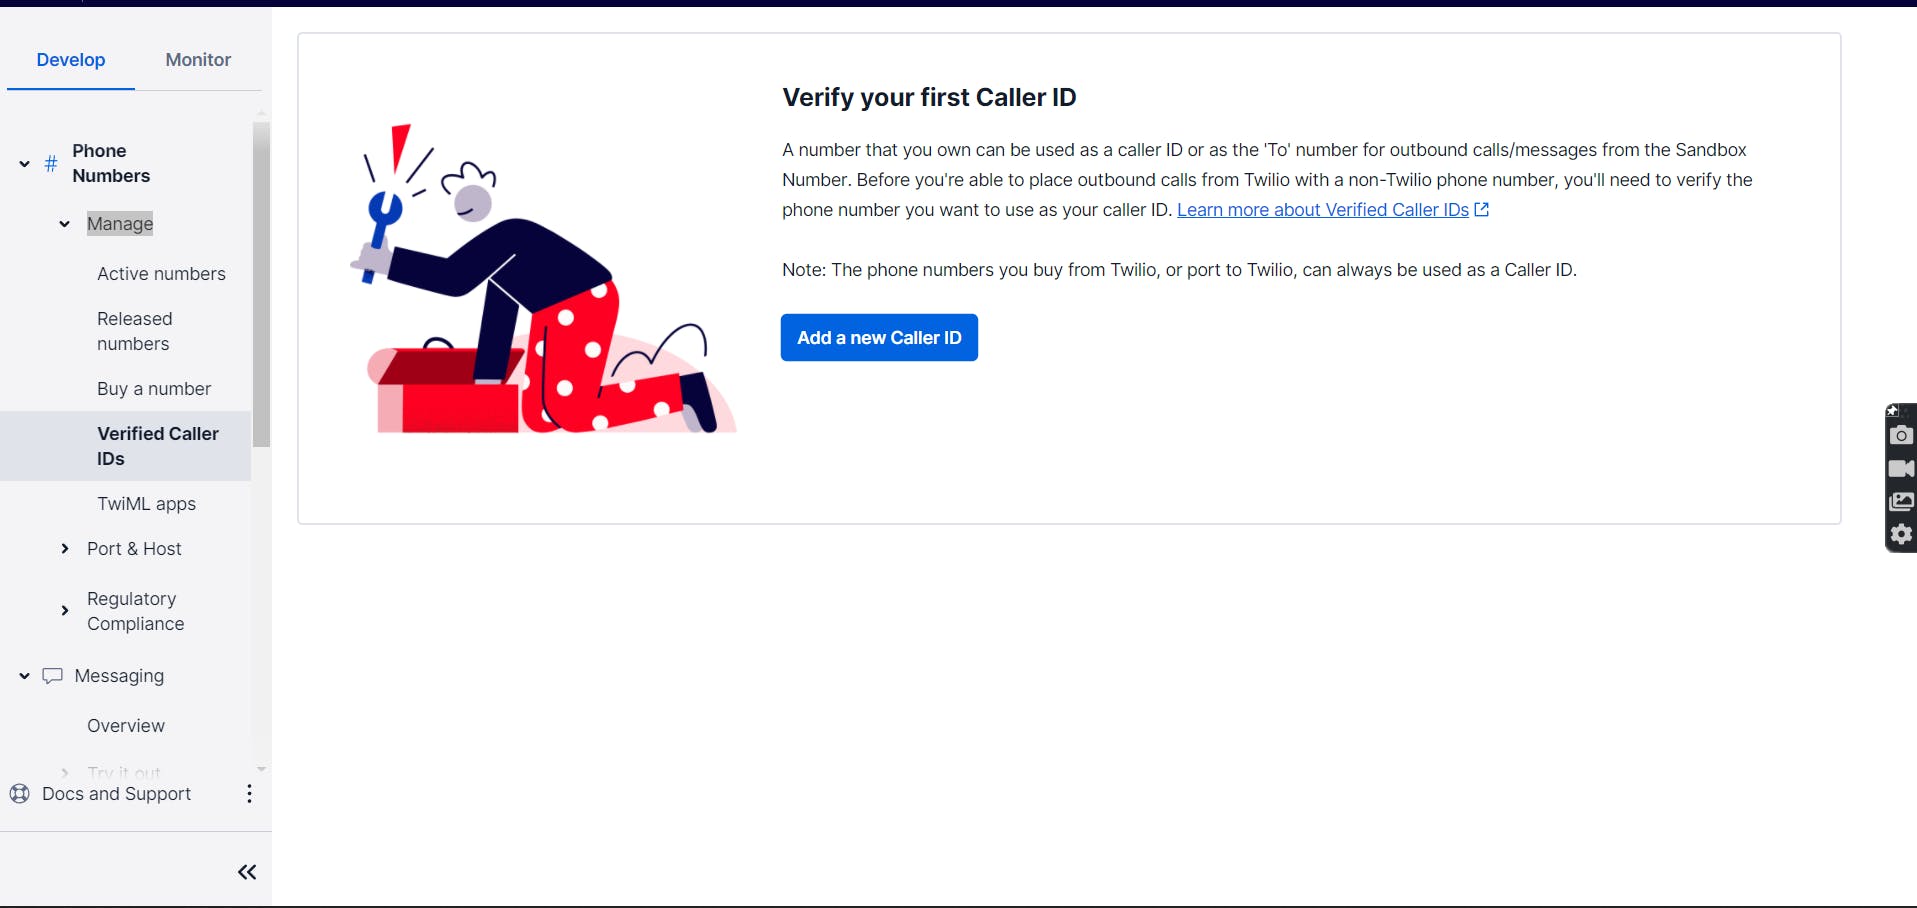
- Now press on the Add a new Caller ID button. It will open a small window and ask you to enter the new phone number and the country. Add the phone number to which you wish to send messages. So for testing purposes add your own phone number. Also, in the extension, add your country code.
- Once you are done, press the verify number button, then enter the OTP received on your mobile and press submit. That's it. You can now send messages to this particular phone number.
Step 2
In the next step, we will see how to add the Twilio package to our Flutter codebase.
- The package that we will use is twilio_flutter.
- In order to get the package, open your Flutter project, head on to pubspec.YAML file and add the dependency like this.
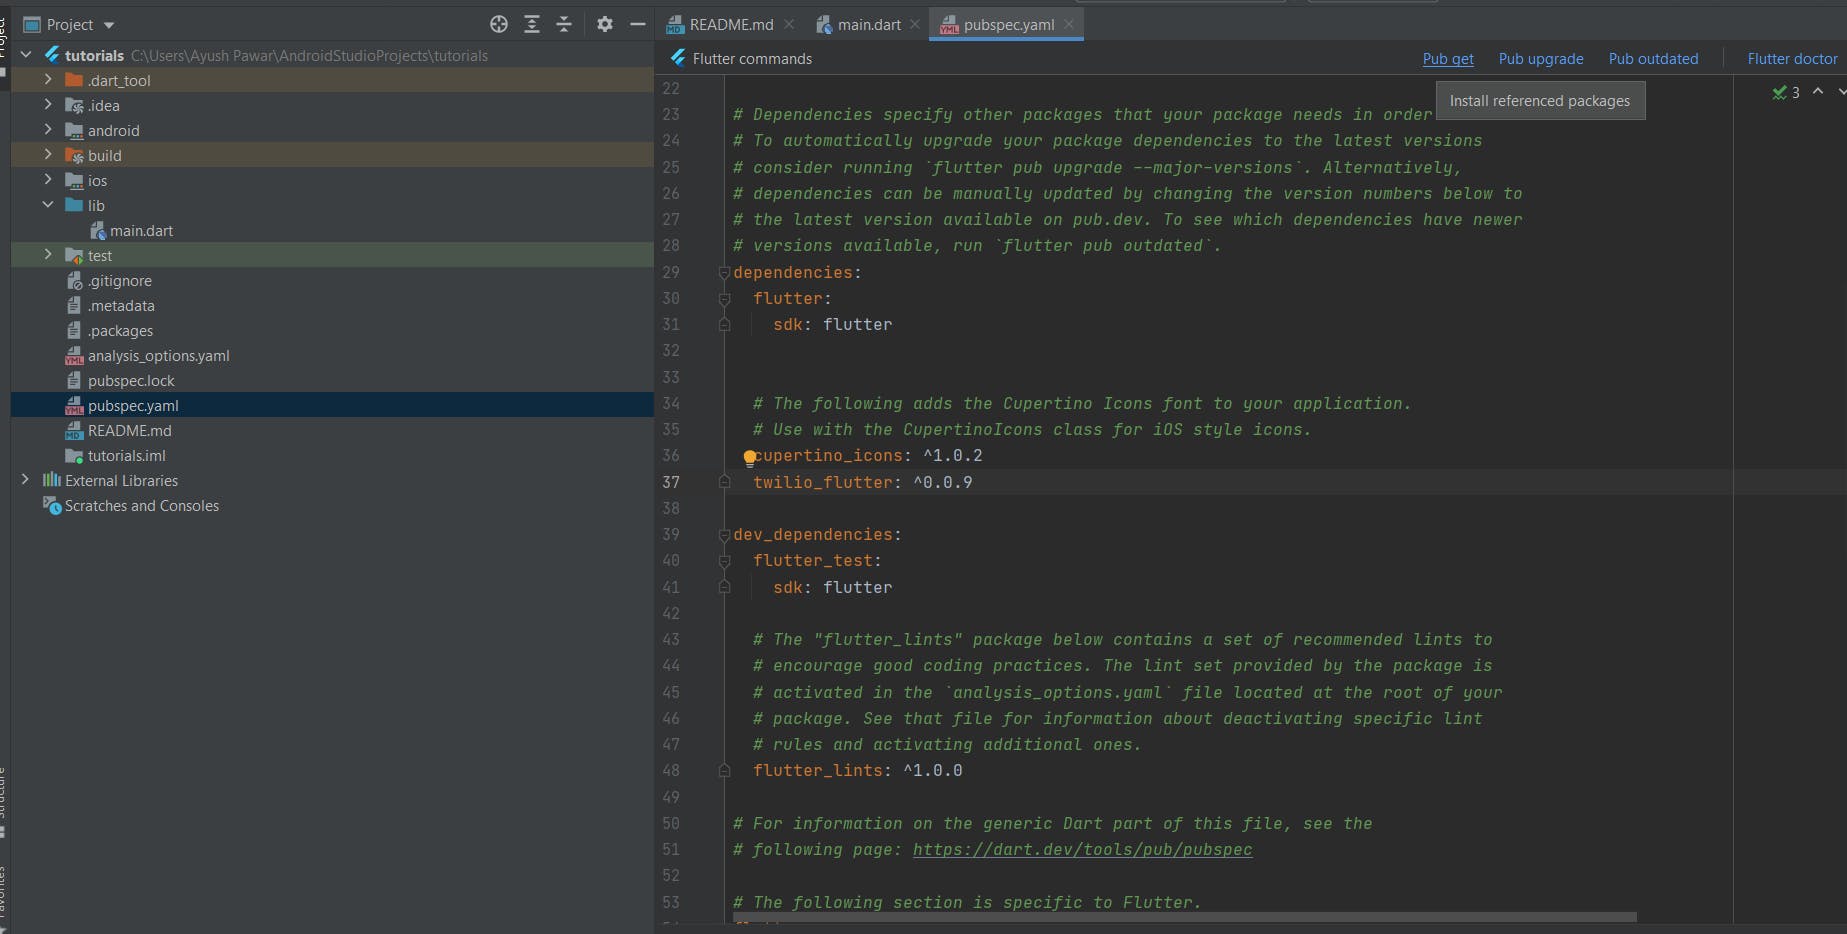
- After adding the dependency, tap on the pub-get button on the top right.
- Let Flutter import the package and then we are good to go.
Step 3.
Now that we are done with all our prerequisites, let's start implementing the code.
- First of all, let's create a new file called twilio_service.dart in your lib folder. Now in that file, import the twilio_flutter package.
- Create a class called as TwilioServices and create a new object of the class TwilioFlutter.
import 'package:twilio_flutter/twilio_flutter.dart';

class TwilioServices{
  TwilioFlutter twilioFlutter = TwilioFlutter(
      accountSid: "<Your account SID>", // found on console
      authToken: "<Your auth token>",     // found on console
      twilioNumber: "<Your trial phone number>" // trial phone number is the one from which the messages will be sent. It will probably be a USA phone number.
  );
}
- Next, we will create a function called sendSMS which will send SMS to our verified phone number. Our code will look something like this.
import 'package:twilio_flutter/twilio_flutter.dart';

class TwilioServices{
  TwilioFlutter twilioFlutter = TwilioFlutter(
      accountSid: "<Your account SID>", // found on console
      authToken: "<Your auth token>",     // found on console
      twilioNumber: "<Your trial phone number>" // trial phone number is the one from
       which the messages will be sent. It will probably be a USA phone number.
  );
   void sendSMS()
   {
     twilioFlutter.sendSMS(toNumber: "<Your verified phone number>", messageBody:
    "Hello from Twilio");
   }
}
- That's it. The logical part of our code is done. Now, quickly let's create a button. On tapping it, we will invoke the sendSMS function and send a message to the user.
- I will be using the neumorphism button that we created in our previous tutorial. If you haven't read that article yet, then do check it out.
- Here is the code for the button. Paste the below code in the main.dart file.
import 'package:flutter/material.dart';
import 'package:tutorials/twilio_service.dart';

void main() {
  runApp(const MyApp());
}

class MyApp extends StatelessWidget {
  const MyApp({Key? key}) : super(key: key);

  // This widget is the root of your application.

  @override
  Widget build(BuildContext context) {
    return MaterialApp(
      debugShowCheckedModeBanner: false,
      title: 'Flutter Demo',
      theme: ThemeData(
        // is not restarted.
        primarySwatch: Colors.blue,
      ),
      home: const NeumorphismPage(),
    );
  }
}
class NeumorphismPage extends StatefulWidget {
  const NeumorphismPage({Key? key}) : super(key: key);

  @override
  State<NeumorphismPage> createState() => _NeumorphismPageState();
}

class _NeumorphismPageState extends State<NeumorphismPage> {
  bool _isElevated = true;
  TwilioServices twilioservices = TwilioServices();
  @override
  Widget build(BuildContext context) {
    return Scaffold(
      backgroundColor: Colors.grey[300],
      body: Center(
        child: GestureDetector(
          **onTap: () {
            setState(() {
              _isElevated = !_isElevated;
              twilioservices.sendSMS();  // our sendSMS function being called when we tap the button
            });
          },**
          child: AnimatedContainer(
  duration: const Duration(
    milliseconds: 200,
  ),
  height: 200,
  width: 200,
  decoration: BoxDecoration(
    color: Colors.grey[300],
    borderRadius: BorderRadius.circular(50),
    boxShadow: _isElevated
        ? [
      const BoxShadow(
        color: Colors.grey,
        offset: Offset(4, 4),
        blurRadius: 15,
        spreadRadius: 1,
      ),
      const BoxShadow(
        color: Colors.white,
        offset: Offset(-4, -4),
        blurRadius: 15,
        spreadRadius: 1,
      ),
    ]
        : null,
  ),
),
        ),
      ),
    );
  }
}
- Now, tap on the run button in your IDE and let the app run on your emulator or your connected device.
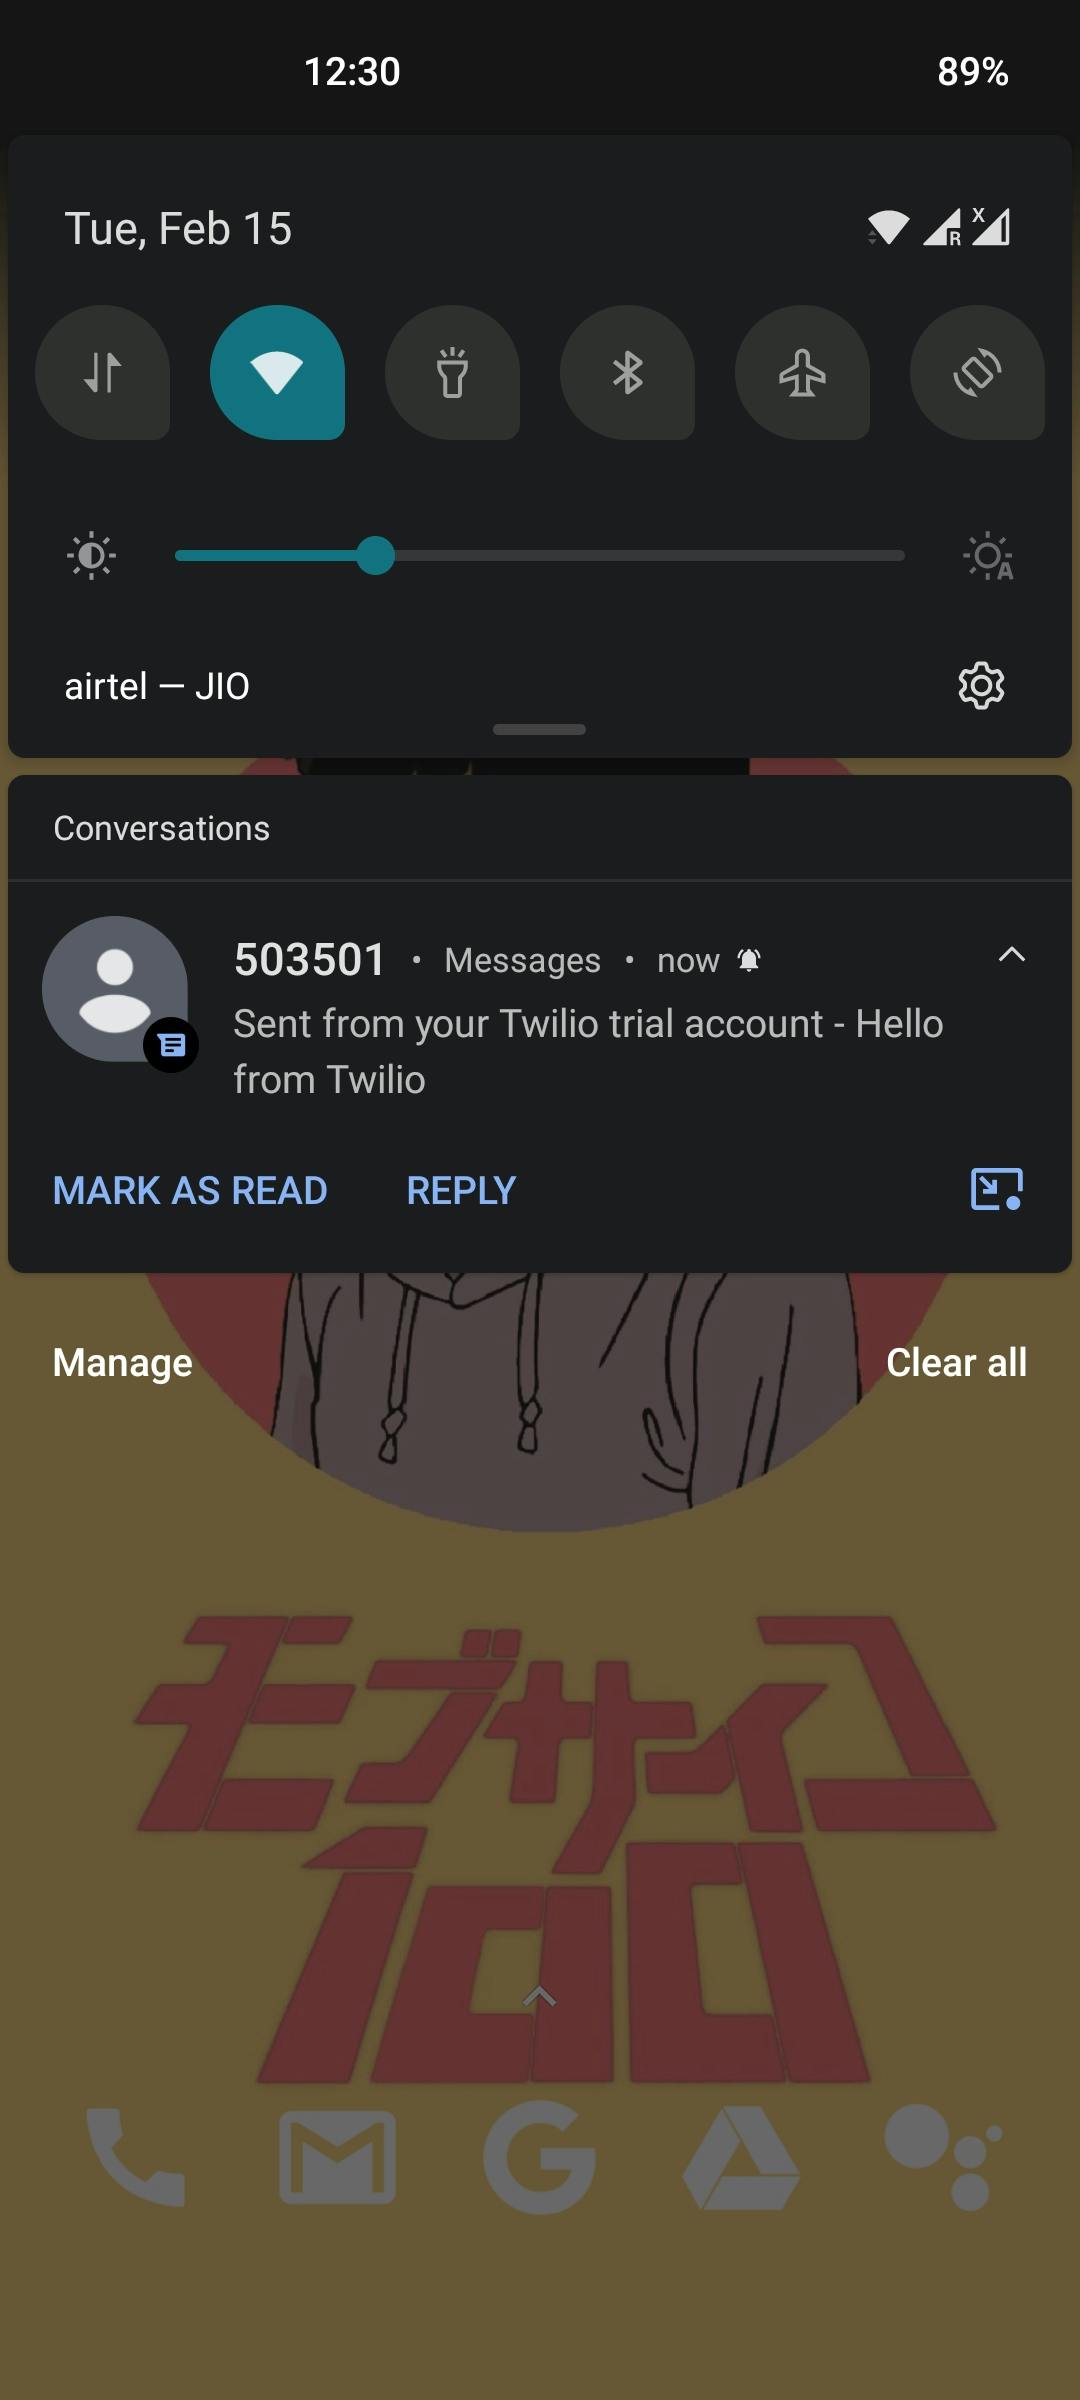
- Tap on the button and now you should receive a message like this on your registered mobile number.
Common Errors
If you face some errors like phone numbers are not verified. Try to add the country code in the codebase.
For example in the sendSMS and function, make sure the number is in this format.
<Country Code><Phone Number> // +919876543210
The same goes for the trial number too. If you get some more errors, then search on stack overflow for solutions. Searching for the answers on your own will make you a better developer.
Conclusion
So this concludes our guide on Twilio integration with Flutter. We have covered;
- How to make an account on Twilio.
- How to verify a phone number and add a trial number.
- How to add Twilio services to your Flutter code.
- How to successfully send an SMS on your verified phone number via Flutter and Twilio.
Make sure you follow cswithiyush for more such tutorials, ticks & trips on Flutter and DSA.

