

How to integrate Razorpay Payments with Flutter

Android App Developer & Product Engineer @Mosaic Wellness. 4x Hackathon Winner. SWE Intern @Bonito Designs, @Legato Health Tech. Open for Freelance gigs. Documenting my tech journey via Hashnode & ranting about my life on Twitter.
Introduction 📕
The payment feature is a very common feature in a lot of apps like e-commerce, subscription-model app, etc. There are a few payment SDKs that work well with Flutter like Stripe & Razorpay. Today we will see how you can integrate the Razorpay SDK with Flutter. So without wasting any time, let's get started.

Project Setup 🔨
To integrate the Razorpay SDK, we will need a Razorpay account first. Go to this website, create a new account. Then, you will reach your dashboard. In your left panel, go to the settings tab. There you will see an API keys section on top. Tap on it.
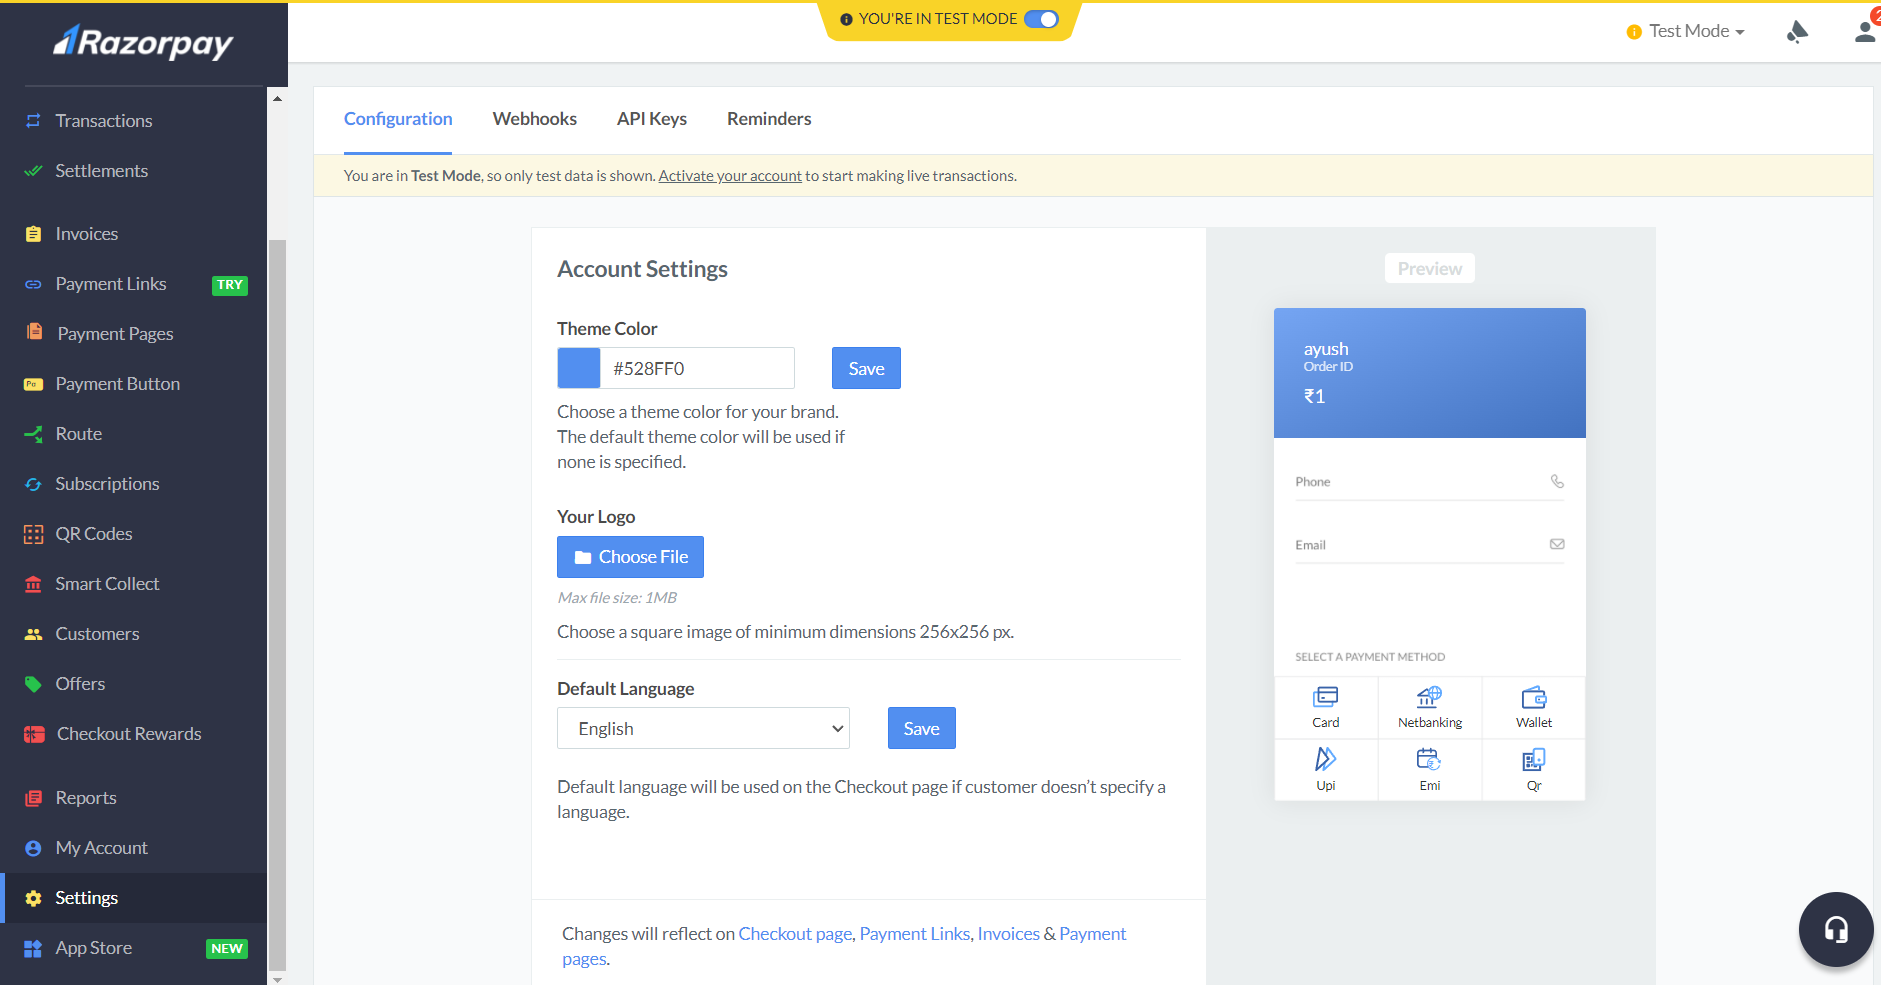
Create a new API key. There will be two fields, key_id, and secret key. We need the key_id. So keep it safe with you because we will use it later. We will use the razorpay_flutter package. So let's add it to our pubspec file.
dependencies:
  flutter:
    sdk: flutter

  # The following adds the Cupertino Icons font to your application.
  # Use the CupertinoIcons class for iOS style icons.
  cupertino_icons: ^1.0.2
  razorpay_flutter:
Import the package in your main.dart file or wherever you are coding your logic.
import 'package:razorpay_flutter/razorpay_flutter.dart';
We are done with our setup. Let's code our logic.
Coding the Logic 🧑🏻💻
First of all, we will create a new instance of the Razorpay class. We will initialize in the initstate function.
late Razorpay _razorpay;

@override
void initState() {
  super.initState();
  _razorpay = Razorpay();
}
We will need 3 functions to handle 3 states.
- Payment Success
- Payment Failure
- Handling External Wallet
These 3 functions will trigger whenever there is a success or failure or payment via an external wallet like Paytm.
Here is the code for all the 3 functions. Read comments to understand what they are doing. I am just printing the messages, you can use the snack bar to show messages to the user and you can redirect them to do, and all that stuff in these functions.
// to handle successful payments
void _handlePaymentSuccess(PaymentSuccessResponse response) {
 print("SUCCESS: " + response.paymentId!);
  }

 // to handle payment errors. I am just printing the response.
  void _handlePaymentError(PaymentFailureResponse response) {
  print("ERROR: " + response.code.toString() + " - " + response.message!);
  }

 // to handle cases when payment is made via external wallet.
  void _handleExternalWallet(ExternalWalletResponse response) {
  print("EXTERNAL_WALLET: " + response.walletName!);
  }
When will any of these functions trigger though? They will trigger when we come back to our app from the Razorpay interface. But when do we go to the Razorpay interface? We go to the Razorpay interface when we tap on the pay button.
So let's look at the logic to open the Razorpay interface when the user taps the ''Pay Now" button.
void openCheckout() async {
 var options = {
 'key': '<Your test API key>',
 'amount': 100,
 'name': '<Whom you are sending>',
 'description': 'Fine T-Shirt',
 'retry': {'enabled': true, 'max_count': 1}, // retries if the payment fails
 'send_sms_hash': true,  // sends an sms
 'prefill': {'contact': '8888888888', 'email': 'test@razorpay.com'}, // your contact and
                                                                                                                                   email
 'external': {
   'wallets': ['paytm']  // list of external wallets like mobiqwik and paytm
  }
};

try {
   _razorpay.open(options);  // this line will open your Razorpay interface.
 } catch (e) {
    debugPrint('Error: e');   // prints the error if unable to open the interface.
 }
}
This is a function that sets all the required attributes for Razorpay. Let's quickly create a TextButton. On tapping that button, we will trigger this function and then the interface will open.
TextButton(onPressed: openCheckout, child: Text('Pay Now'))
The Razorpay interface looks something like this.
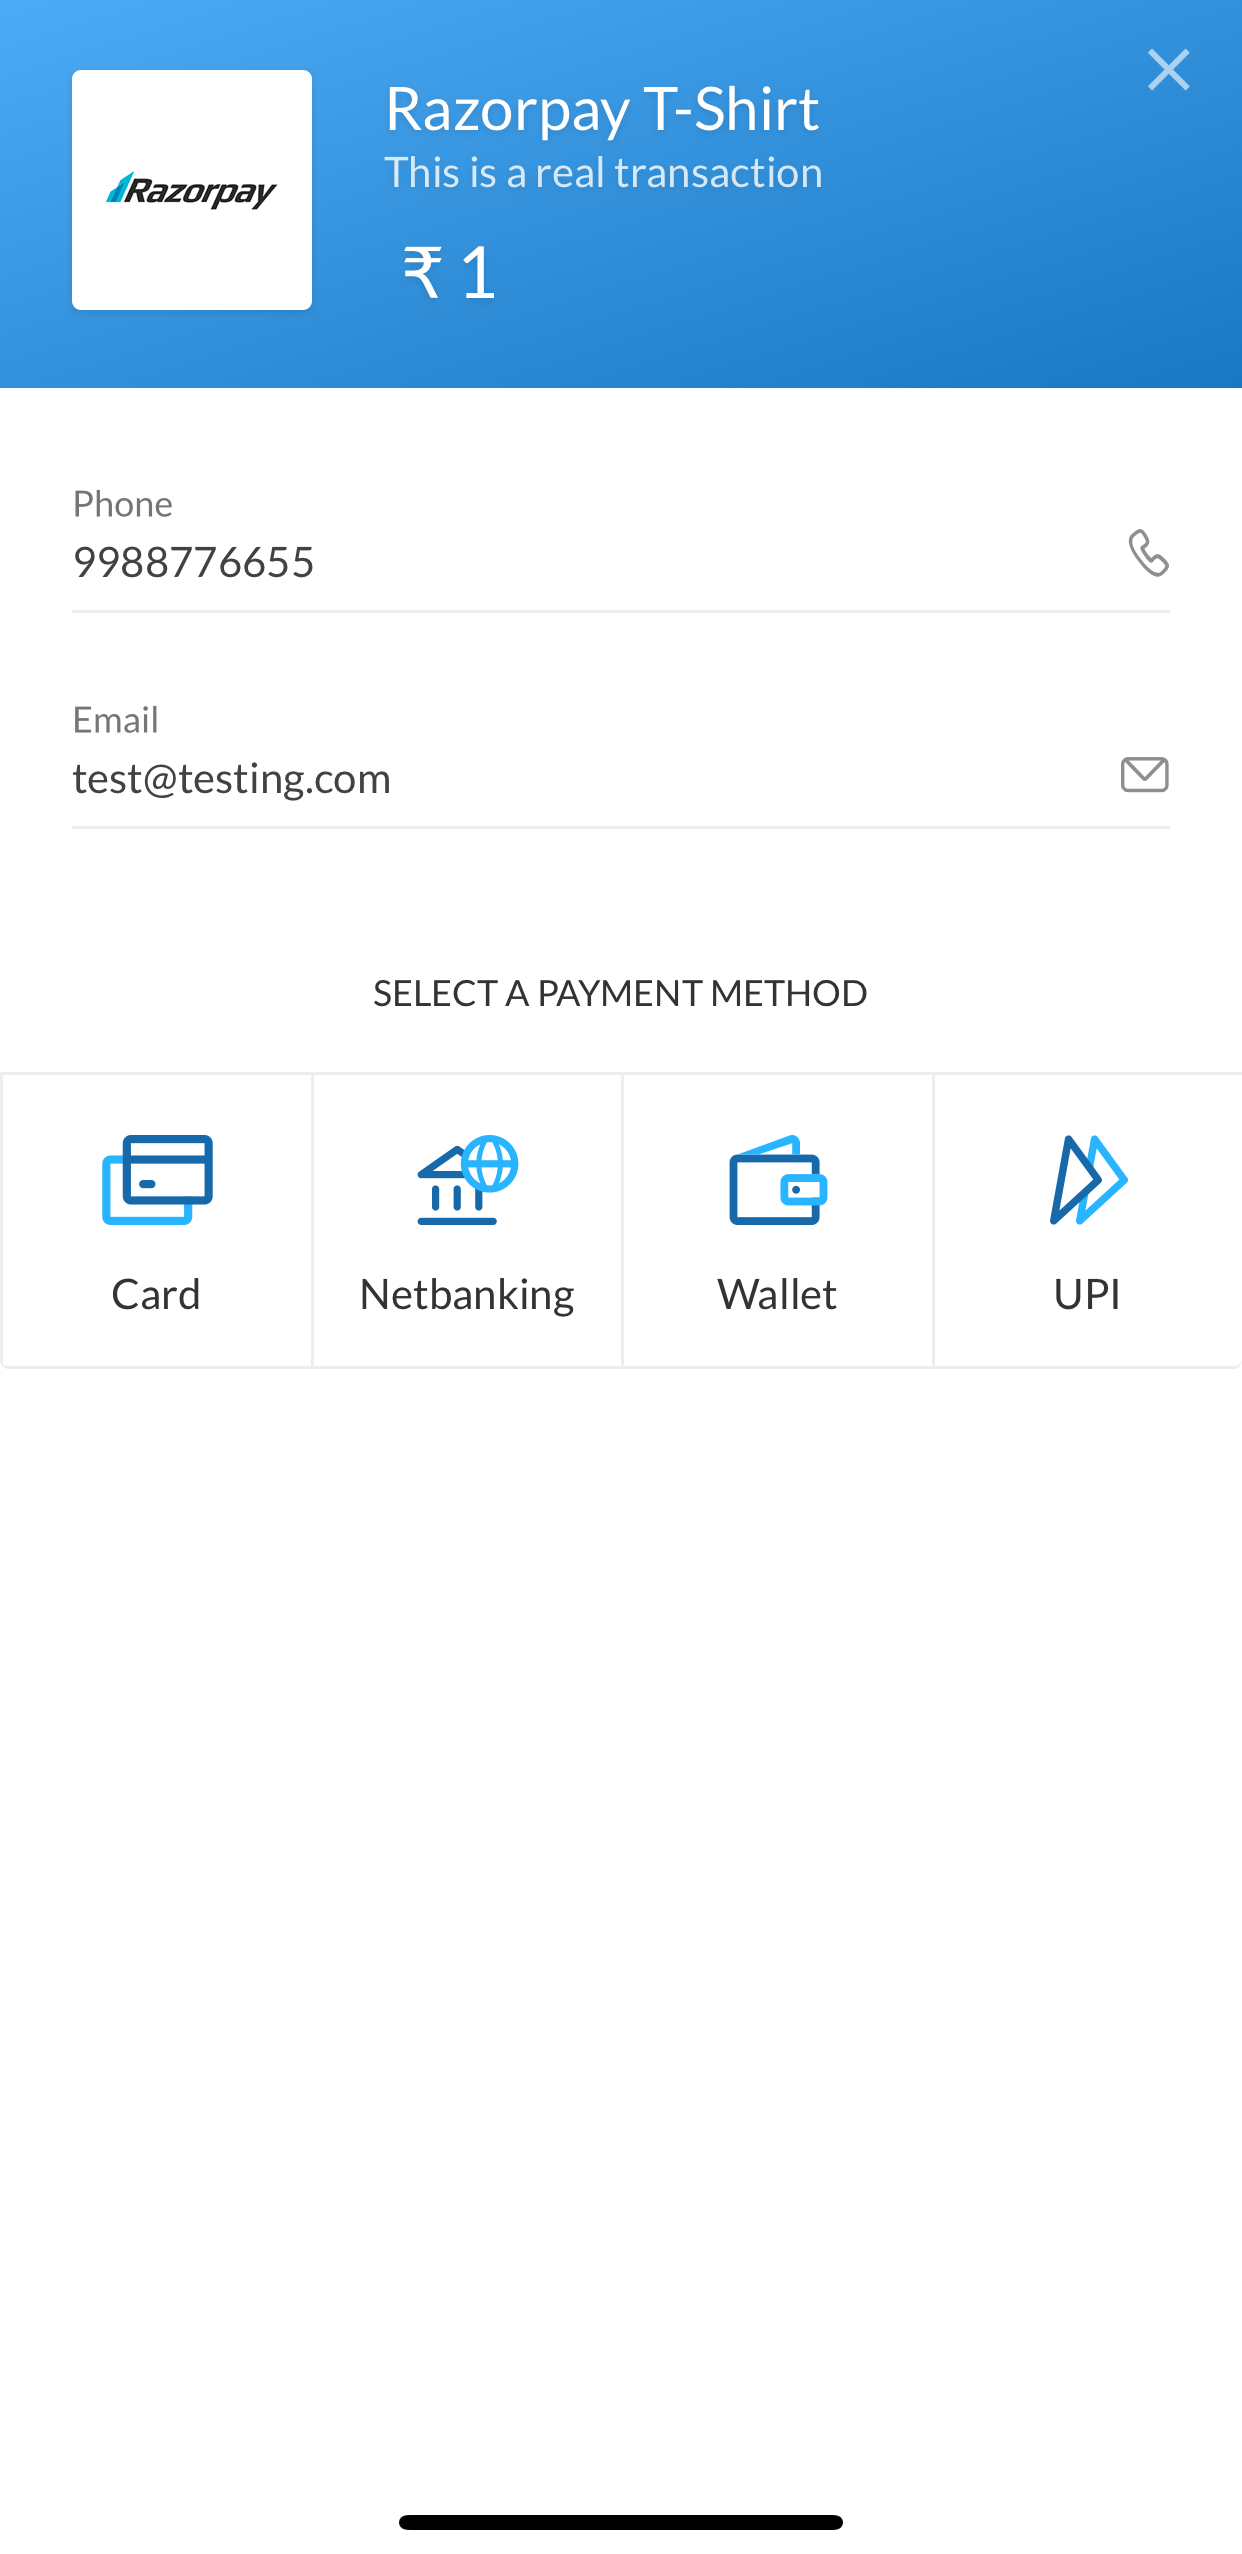
Try making a payment. Here are some test credentials.
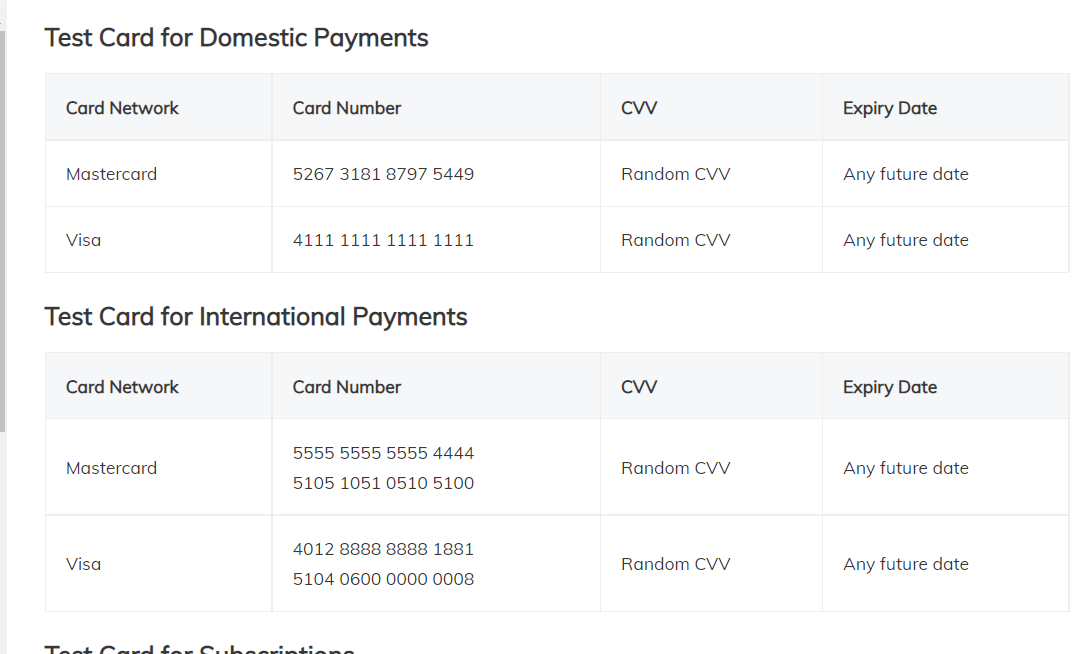
If you want to make a dummy UPI payment. Type success@razorpay in the UPI ID text field.
Remember the 3 functions that we created? Add them in the initstate. We add them in the initstate because when we will be redirected to our app via Razorpay, the initstate will run and the instance will know if there is a payment success or failure and the corresponding function will be triggered accordingly.
This is how our initstate will look right now.
@override
void initState() {
super.initState();
_razorpay = Razorpay();
_razorpay.on(Razorpay.EVENT_PAYMENT_SUCCESS, _handlePaymentSuccess);
_razorpay.on(Razorpay.EVENT_PAYMENT_ERROR, _handlePaymentError);
_razorpay.on(Razorpay.EVENT_EXTERNAL_WALLET, _handleExternalWallet);
}
If there is any failure in payment, you will be redirected to your app and you will get a printed statement of what exactly went wrong.
If there is any success then you will be redirected to the app with a success message.
Conclusion 👋🏻
So if you were successful in making a payment via a dummy id then CONGRATULATIONS, you have successfully completed the payments integration. I hope that you learned something new today.
You can appreciate and support my blogs via.

Also, let's connect on Twitter. Follow CSwithIyush for more amazing tutorials, tips/tricks on Flutter & DSA.


