Introduction 📕
Text-to-Speech is a cool feature that a lot of app uses to implement things like searching a query, adding items in your to-do lists, etc. If you ever thought about how you can implement TTS in Flutter, then today you will get the answer.
We will use the flutter_tts plugin to implement the TTS feature in our app. So without wasting any time, let's get started.

Project Setup 🔨
Add the flutter_tts plugin as a dependency in the pubspec file and also import in the main.dart file or wherever you are coding your logic.
dependencies:
  flutter:
    sdk: flutter
# The following adds the Cupertino Icons font to your application.
  # Use the CupertinoIcons class for iOS style icons.
  cupertino_icons: ^0.1.2
  flutter_tts: 3.3.3    // add this line of code
We also need to change the min SDK version to 21 in the android/app/build.gradle file.
Coding the Logic 🧑🏻💻
With all the setup done, let us start implementing the TTS feature. In the first step, we will create an instance of the FlutterTTS class which will be used to access the methods of the FlutterTTS class.
We will then create three handlers, these three handlers will handle the start, stop, and error part of our text-to-speech service. We will add all the three handlers and initialization of the object in a function and call that function in our initstate. Here is the code for the same
@override
  initState() {
    super.initState();
    initTts();
  }

  initTts() {
    flutterTts = FlutterTts();  // object initialization

    flutterTts.setStartHandler(() {   // will tell the TTS service to start
      setState(() {
        print("playing");
        ttsState = TtsState.playing;
      });
    });

    flutterTts.setCompletionHandler(() {  // will handle the case when piece of text is finished
      setState(() {
        print("Complete");
        ttsState = TtsState.stopped;
      });
    });

    flutterTts.setErrorHandler((msg) {  // will handle errors (if any)
      setState(() {
        print("error: $msg");
        ttsState = TtsState.stopped;
      });
    });
  }
Now that our handlers are ready, Let's move to Step 2.
Step 2
We need two functions and a variable that will store the text that we need to convert into audio. In the start function, we will start converting the text shown on the screen in audio, and in stop, we will stop playing the audio.
  Future _speak() async {
    await flutterTts.setVolume(1);
    await flutterTts.setSpeechRate(1);
    await flutterTts.setPitch(1);

    if (_newVoiceText != null) {
      if (_newVoiceText.isNotEmpty) {
        var result = await flutterTts.speak(_newVoiceText); // stores the converted text in a new variable
        if (result == 1) setState(() => ttsState = TtsState.playing);  // if result is not empty, start the audio service
      }
    }
  }

  Future _stop() async {
    var result = await flutterTts.stop();
    if (result == 1) setState(() => ttsState = TtsState.stopped);
  }
In the speak function, you can see I have set the volume, speech rate, and pitch to 1. All of that is modifiable. So you can create sliders for that as well and make this TTS service more feature-rich.
Now that we have set our handlers, start, and stop function, let's move to Step 3.
Step 3
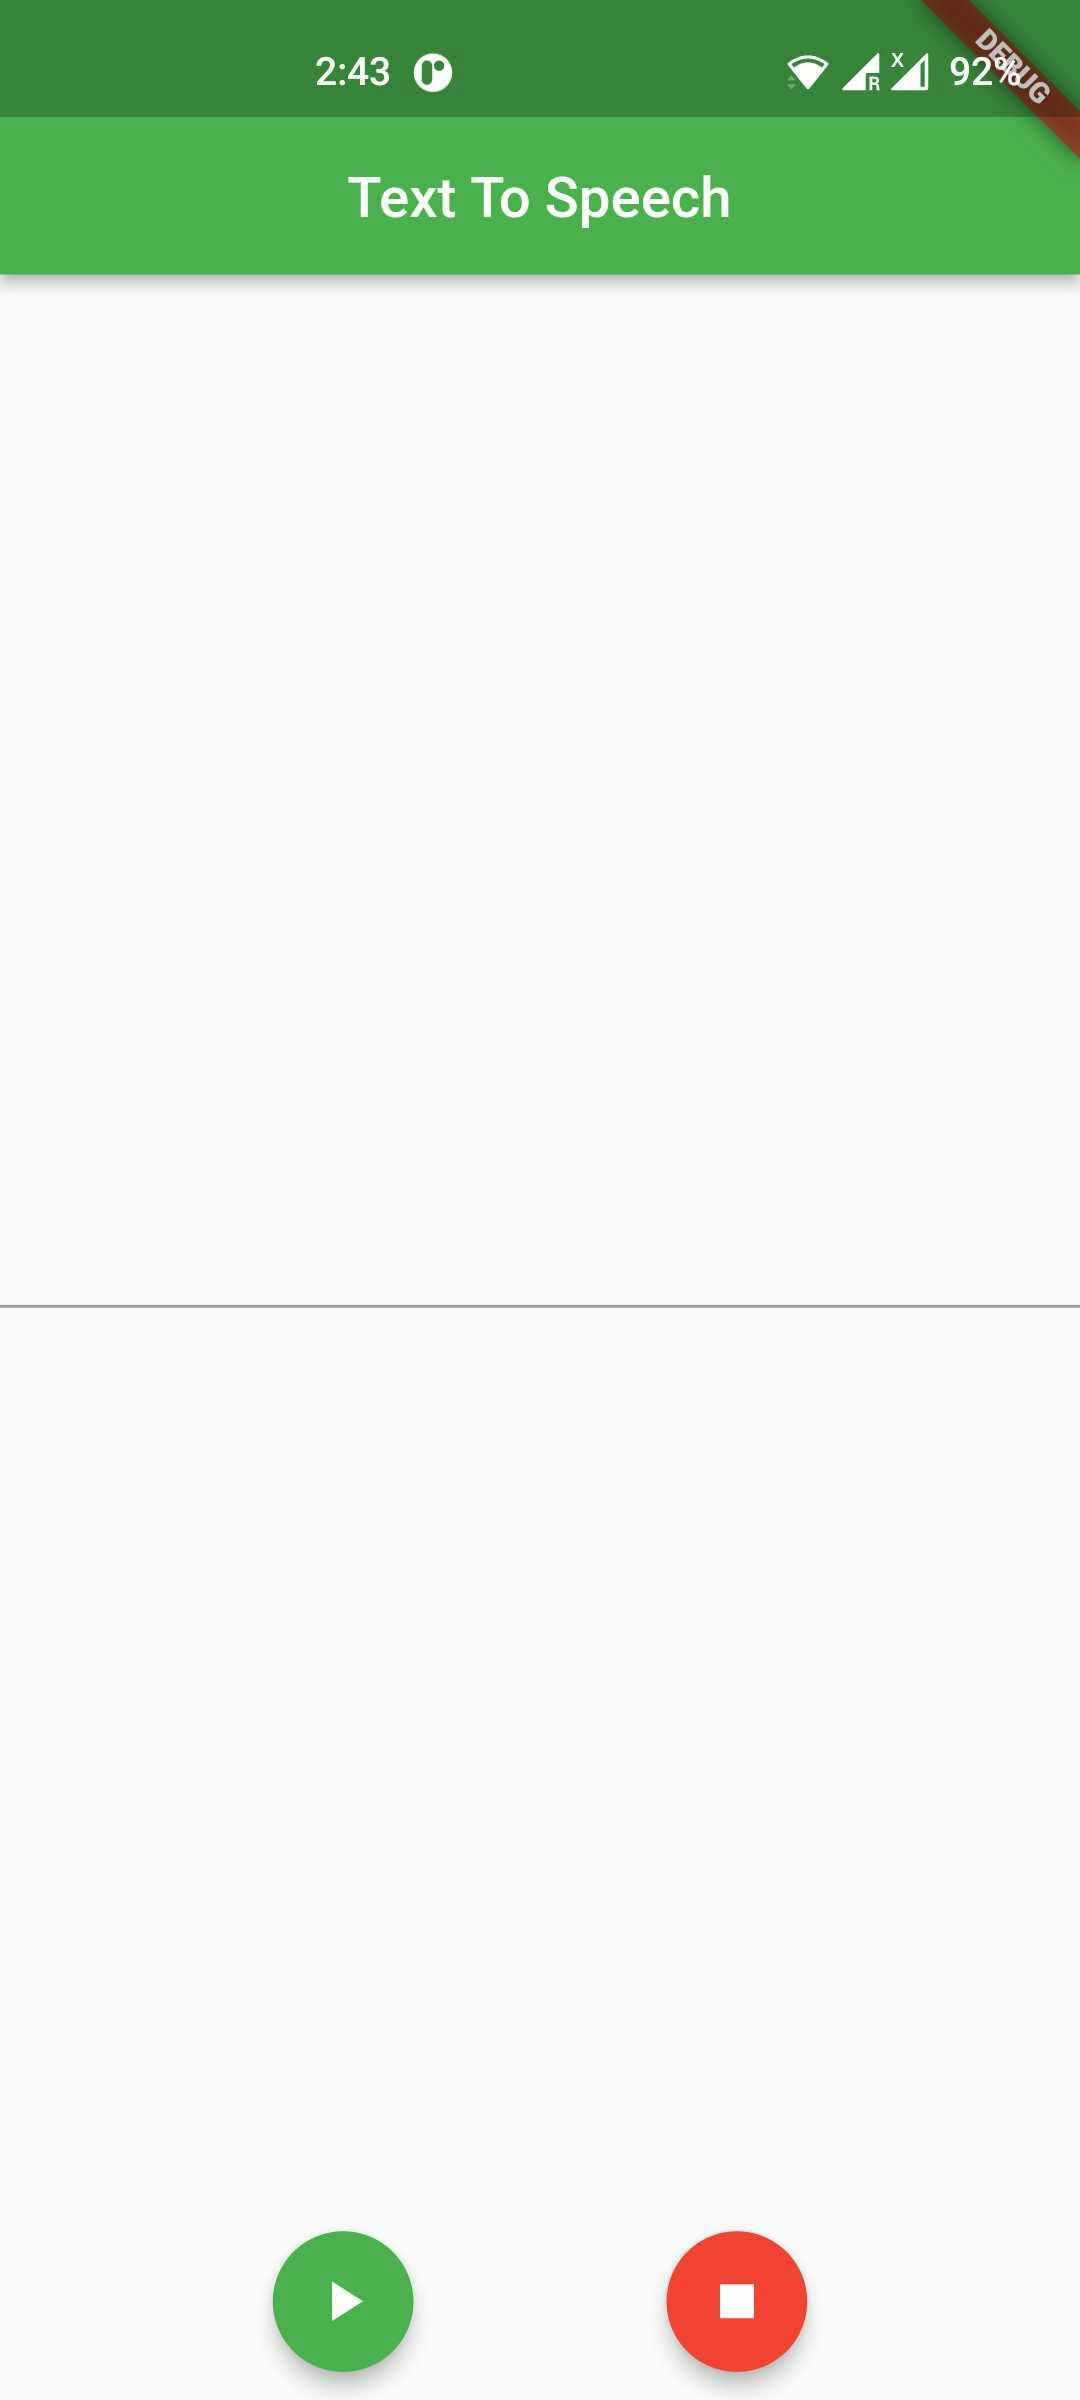
It is time to create some UI and test if things are working or not. For UI, I will create a TextField and two buttons. One for starting the speech and another for stopping it.
I am creating the buttons in the bottom Navigation Bar of the scaffold.
Here is the code for TextField.
body: Center(
  child: TextField(
  onChanged: (value) {
  setState(() {
   _newVoiceText = value;
   });
  },
 ),
),
Here is the code for the two buttons
Container(
  margin: EdgeInsets.all(10.0),
  height: 50,
  child: Row(
   mainAxisAlignment: MainAxisAlignment.spaceEvenly,
   children: <Widget>[
    FloatingActionButton(
    onPressed: _speak,           // play the text on screen
    child: Icon(Icons.play_arrow),
    backgroundColor: Colors.green,
   ),
  FloatingActionButton(
  onPressed: _stop,                // stop the TTS
  backgroundColor: Colors.red,
  child: Icon(Icons.stop),
 ),
 ],
),
),
If you run your app now, you will see a screen with a TextField and two buttons. Something like this

Type anything in the text field and press the green button. The TTS service should work. To stop the speech, press the red button. CONGRATULATIONS! You have successfully learned how to add TTS to your Flutter app.
Flutter_tts is a very feature-rich plugin. You can even set different languages and play the audio in that particular language. All you need to do is add this line of code before the setStartHandler function.
flutterTts.setLanguage('en'); // 'en' means english.
Go to this website, if you want to know the different language codes.
Conclusion 👋🏻
This concludes today's article. I am sure that you will think of creative ways to implement TTS in your Flutter app. I hope that you have learned something new today.
You can appreciate and support my blogs via.

Also, let's connect on Twitter. Follow CSwithIyush for more amazing tutorials, tips/tricks on Flutter & DSA.

