

How to create a QR Code Scanner in Flutter? A complete guide

Android App Developer & Product Engineer @Mosaic Wellness. 4x Hackathon Winner. SWE Intern @Bonito Designs, @Legato Health Tech. Open for Freelance gigs. Documenting my tech journey via Hashnode & ranting about my life on Twitter.
Introduction 📕
In today's article, we will look at how you can create or implement a QR code scanner feature in Flutter. This feature can be useful if you are making an app to provide information, book tickets, etc. So without wasting any time, let's get started.

Project Setup 🔨
First of all, we will add the qr_code_scanner package in the pubspec.
dependencies:
  flutter:
    sdk: flutter

  # The following adds the Cupertino Icons font to your application.
  # Use the CupertinoIcons class for iOS style icons.
  cupertino_icons: ^1.0.2
  qr_code_scanner:
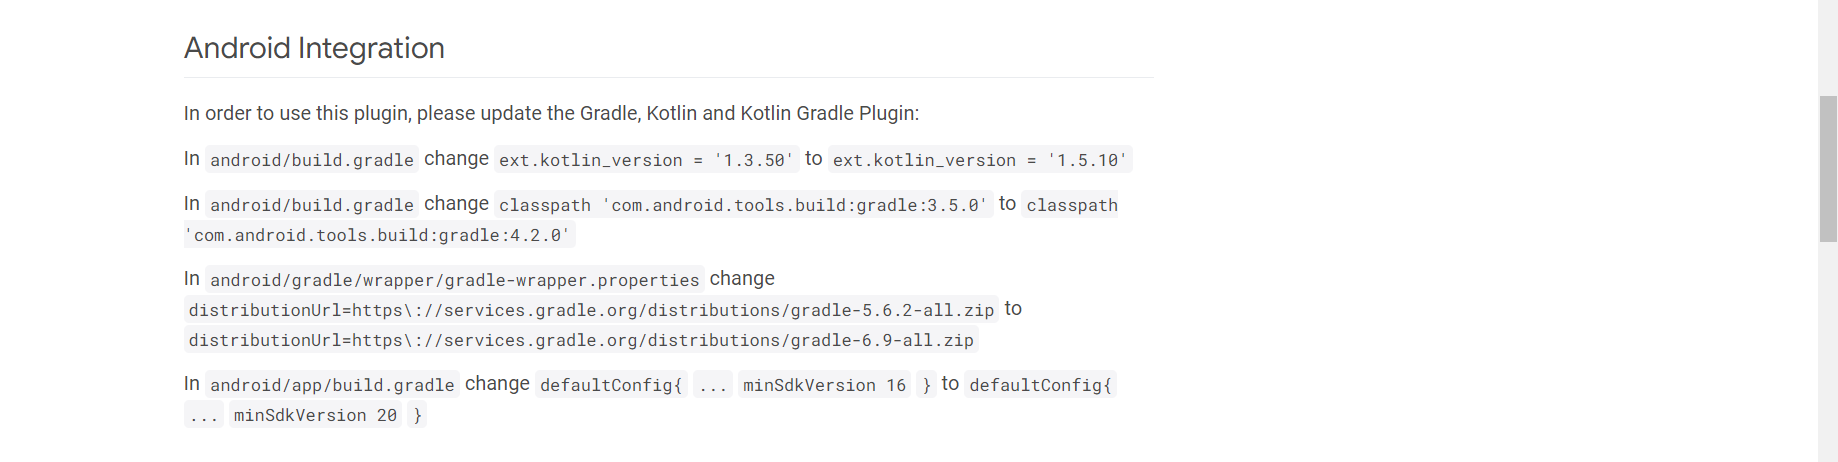
We also need to make some changes in build files and Gradle files to set up for Android. Look at the image below and make the required changes.
If you are building for iOS, make these changes.

Once you are done making these changes, import the package in main.dart
qr_code_scanner:
Coding the Logic 🧑🏻💻
Step 1
First, we will create a global key, a Barcode object, and a QRView controller.
final GlobalKey qrKey = GlobalKey(debugLabel: 'QR');
  Barcode? result; // stores the content of a barcode/qr code
  QRViewController? controller; // controller to control the actions of the qrview.
After this, we use the QRView widget which is basically the camera interface for our QR code scanner.
// some flutter code

QRView(
  key: qrKey,  // key
  onQRViewCreated: _onQRViewCreated, // this is the function that will get triggered
                                                                         when the QRView widget renders.
),
Step 2
The onQRViewCreated function is the main component of this feature. This function takes in the QRView controller and listens to the activity happening on the camera. So if we are scanning a QR code, it listens to it and passes the data as a stream. From the stream, we store the data of the QR code in our Barcode object.
Here is the code of the function with comments.
  void _onQRViewCreated(QRViewController controller) {
    this.controller = controller;
    controller.scannedDataStream.listen((scanData) {  // listens to the data stream
      setState(() {
        result = scanData;    // storing all the data in result
      });
    });
  }
We are using setstate to update our result because we are showing the contents of the result in our UI. The _onQRViewCreated function will handle qr code scanning.
Now we will create a text widget that shows what is actually present in the qr code. We will add this widget below our QRView widget and wrap it in a Column.
Expanded(
 flex: 1,
 child: Center(
 child: (result != null)
     ? Text(
         ' Data: ${result!.code}')  // .code contains the data inside a QR code.
      : Text('Scan a code'),
   ),
)
As you can see, I have used a ternary operator on our Text widget. if the result variable is null, we will show some dummy text and if not, we will show the data in our result variable.
Step 3
There is one last thing left. If you are hot restarting your Flutter app, then the camera needs to be paused for android and resumed for iOS. So for that, override the reassemble function which runs while hot restarting.
void reassemble() {
super.reassemble();
if (Platform.isAndroid) {
 controller!.pauseCamera();
} else if (Platform.isIOS) {
   controller!.resumeCamera();
 }
}
In the end, quickly create a dispose function to dispose of the controller that we have created.
  @override
  void dispose() {
    controller?.dispose();
    super.dispose();
  }
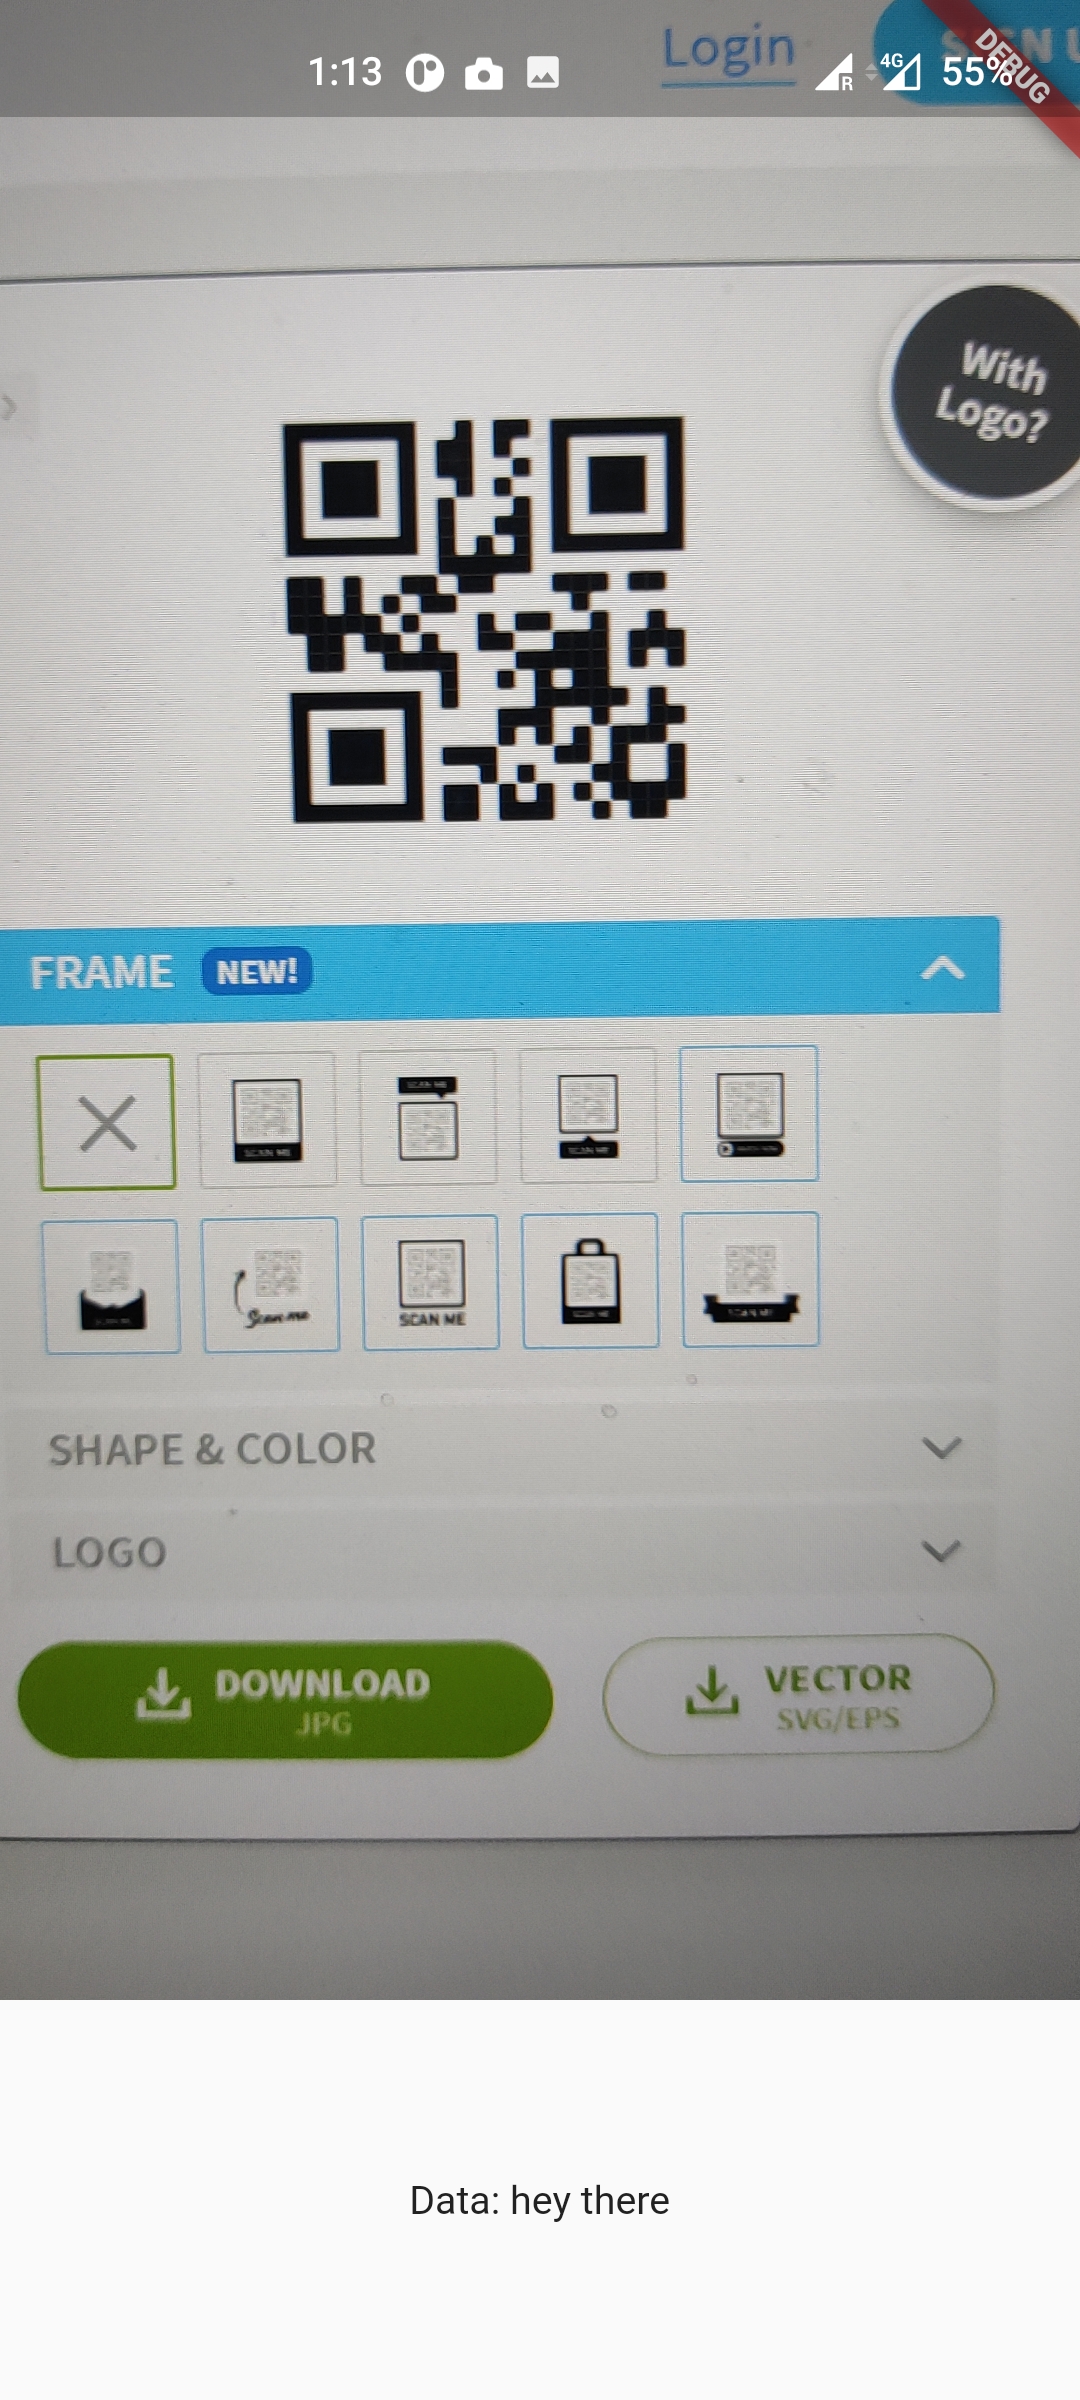
Run your Flutter app and you will see the camera opened up. Go on this website to create some QR codes with dummy data. Create one QR code and try scanning it with the Flutter app. You will see that the dummy data will be rendered on the screen once the QR code has been scanned successfully.
Conclusion 👋🏻
So with this, we conclude our article on how to implement or create a QR code scanner for your Flutter app. I hope you learned something new today. CONGRATULATIONS if you were successfully able to implement this feature.
You can appreciate and support my blogs via.

Also, let's connect on Twitter. Follow CSwithIyush for more amazing tutorials, tips/tricks on Flutter & DSA.


