How to create a Discord Bot using nextcord in Python
A Discord Bot that sends Dad Jokes!!!
The famous discord.py library has been migrated to nextcord. I decided to build a discord bot that will send you Dad Jokes to tickle your funny bone whenever you are exhausted with your work. Wanna learn how to build the same? Follow along with me then.
Prerequisites
There are a few things that we will need before we start coding the bot.
- A discord bot account and Python installed on your Desktop
- A RapidAPI account
Access to a Dad Joke API.
 Let's start with requirement number one. It is very easy to create a bot on Discord.
 Visit the Discord Developer Portal If you don't have a discord developer account, create one. Once you are done, you will see a screen like this.
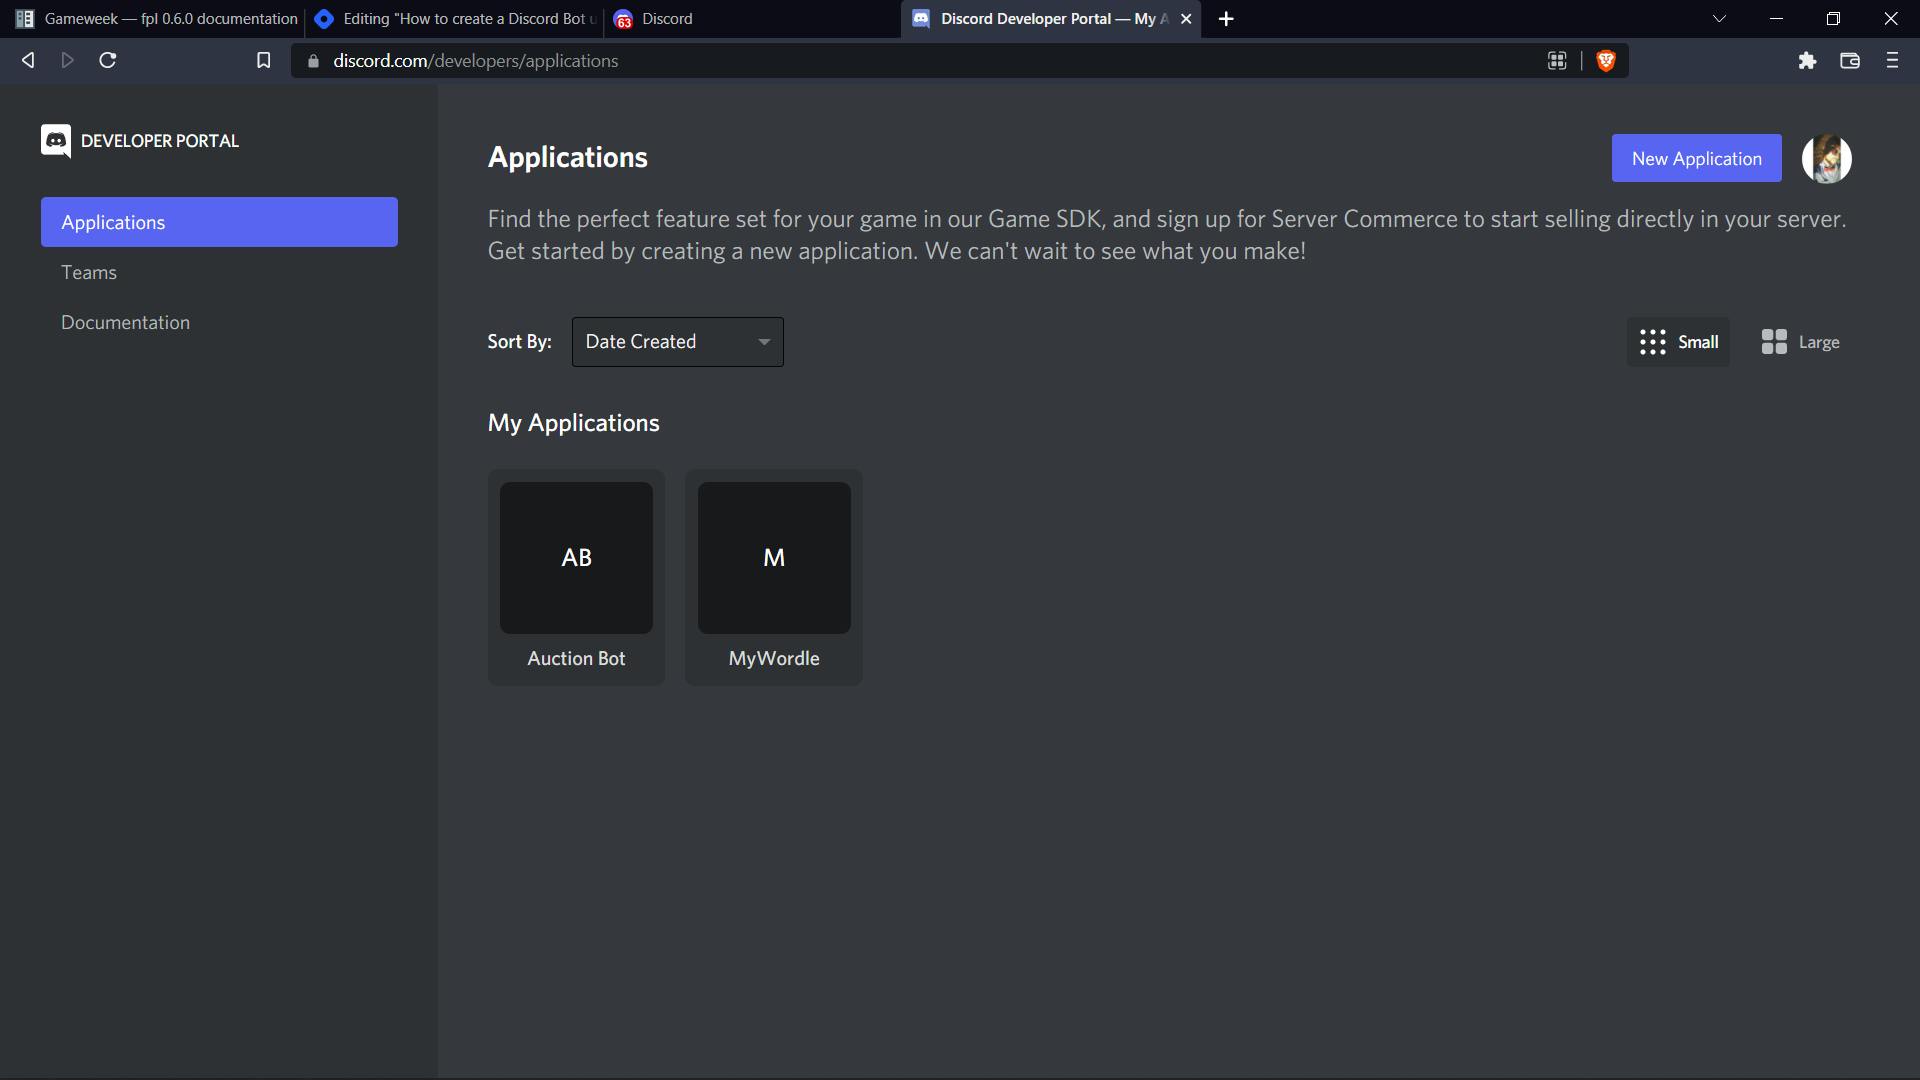
- Now, press on the +New Application button on top right. It will open a small floating window. Enter the name of your choice for your bot. Press on Create and Voila!.
- You have successfully created a Discord Bot.
Now onto requirement number 2. Leave this tab just like it is and open a new tab.
- Click here to go to RapidAPI. Once again, if you don't have an account, then create one.
Now onto requirement number 3
- Once you are done with setting up your RapidAPI account, click here to get the API that we are using.
- On the top right, you will find a subscribe button. Press it. It will ask for the type of subscription you want. Select the basic plan. We can send 50 requests per day with this API for free. That should be enough for us.
Let's Code!
Now that we are done with all the prerequisites, let's jump to VS Code or any IDE of your choice. Let's break down our development process into 3 simple steps.
1) Adding our bot to a server. & creating the env file.
2) Importing the required packages.
3) Writing the logic to get a joke and send it on the discord server.
Adding our bot to a server & creating the env file.
- Adding a bot to your sever is pretty simple. Head on to the URL Generator Tab in OAuth2 Tab. Select the following permissions
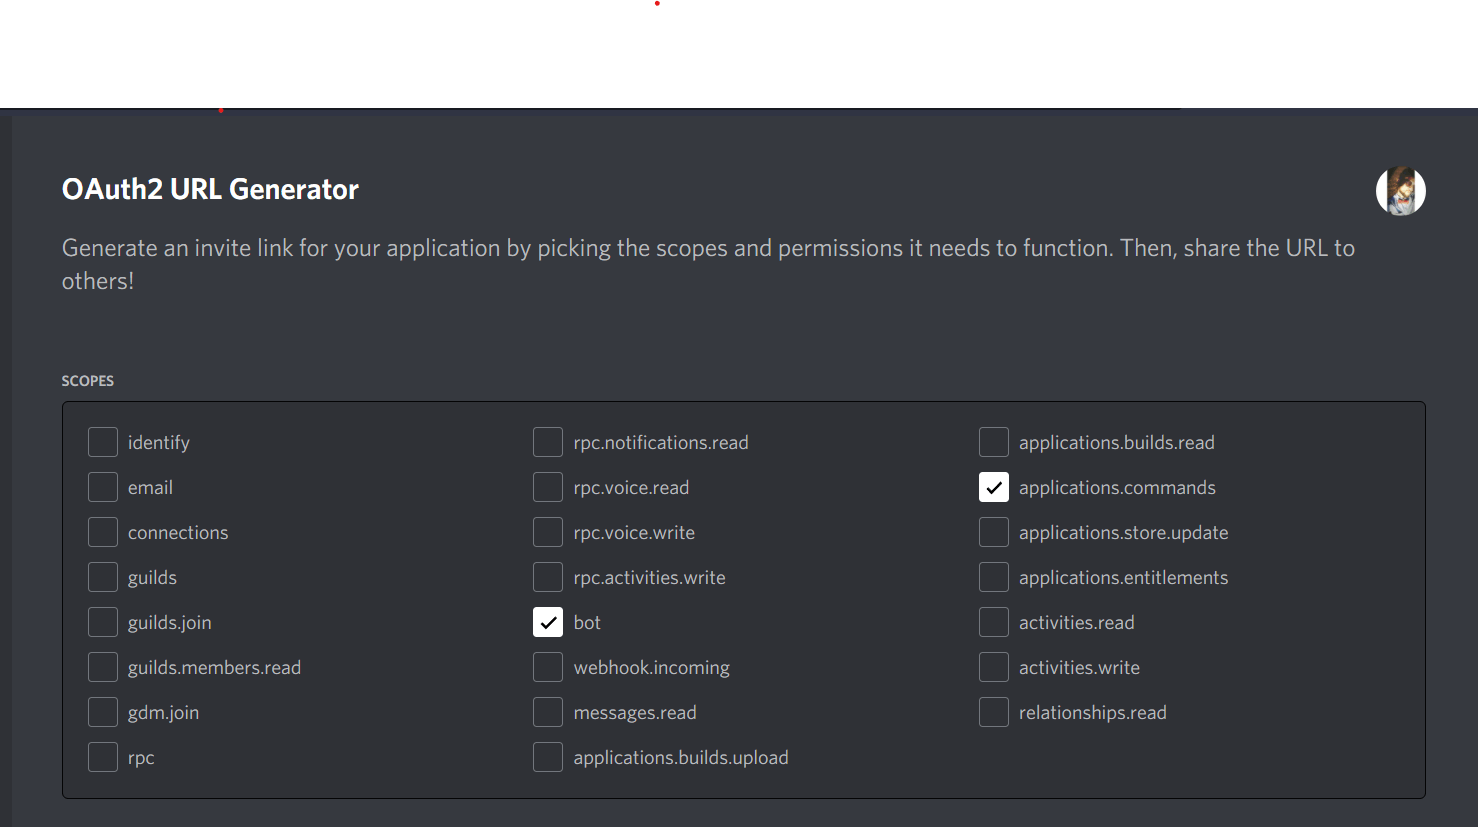
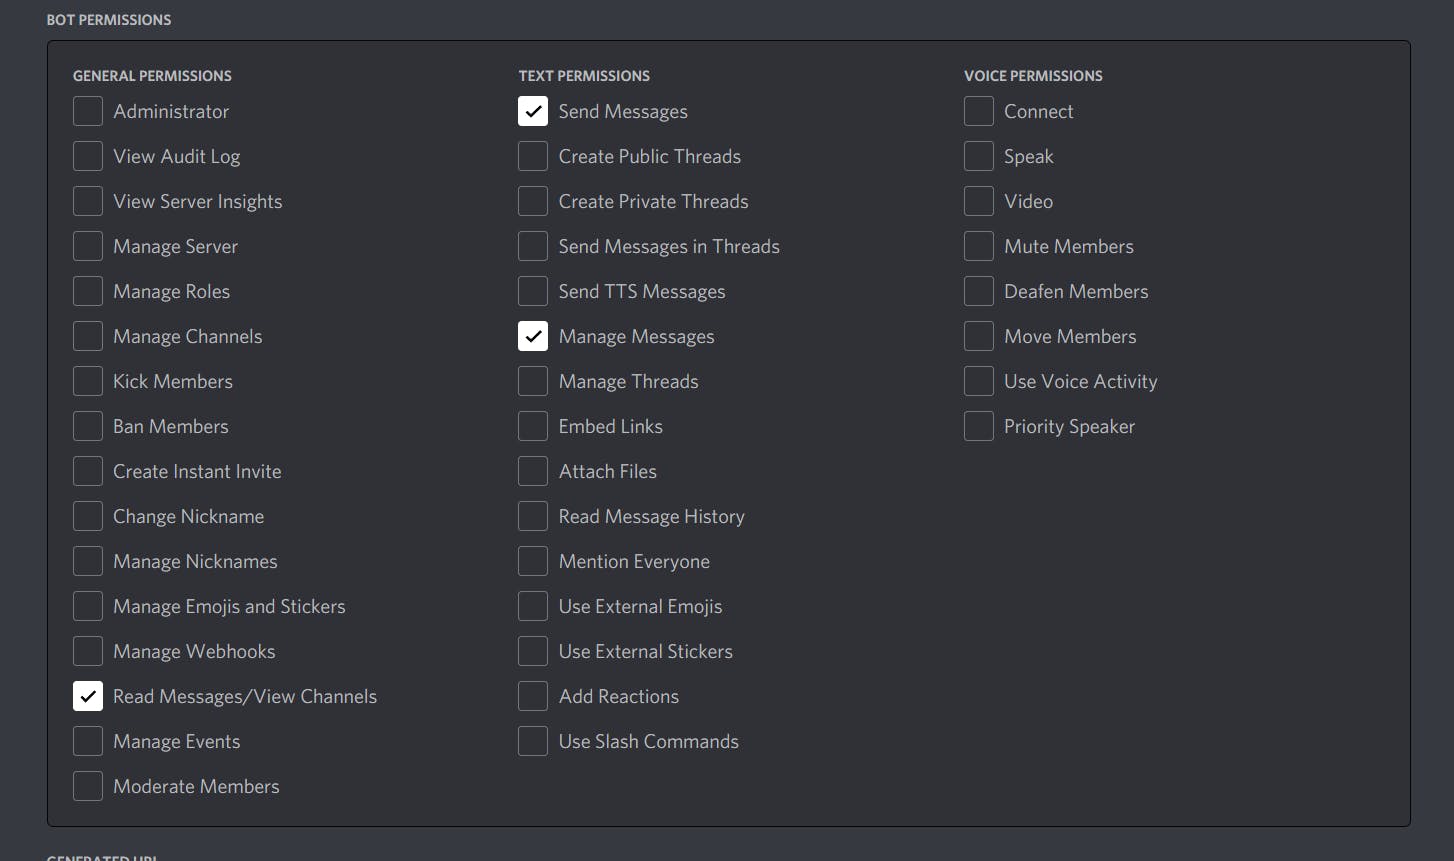
After doing this, tap the copy button on the bottom right. Now paste that link in the new tab and you will get a pop-up asking you for the server on which you want to add your bot to.
After selecting the server, press okay and that's it. Your bot has been successfully added to a server.
Now, let's create the env file. We will need to store 2 things inside it.
1) The Api-key
2) Our Bot token.
You can find your api key on the endpoints tab of your api on the RapidAPI website.
You can get your bot token by following these steps.
- Head on to the Discord developer portal once again.
- Make sure you are in your bot application.
- Select the Bot tab from the left panel. After doing all this, You will see a screen like this
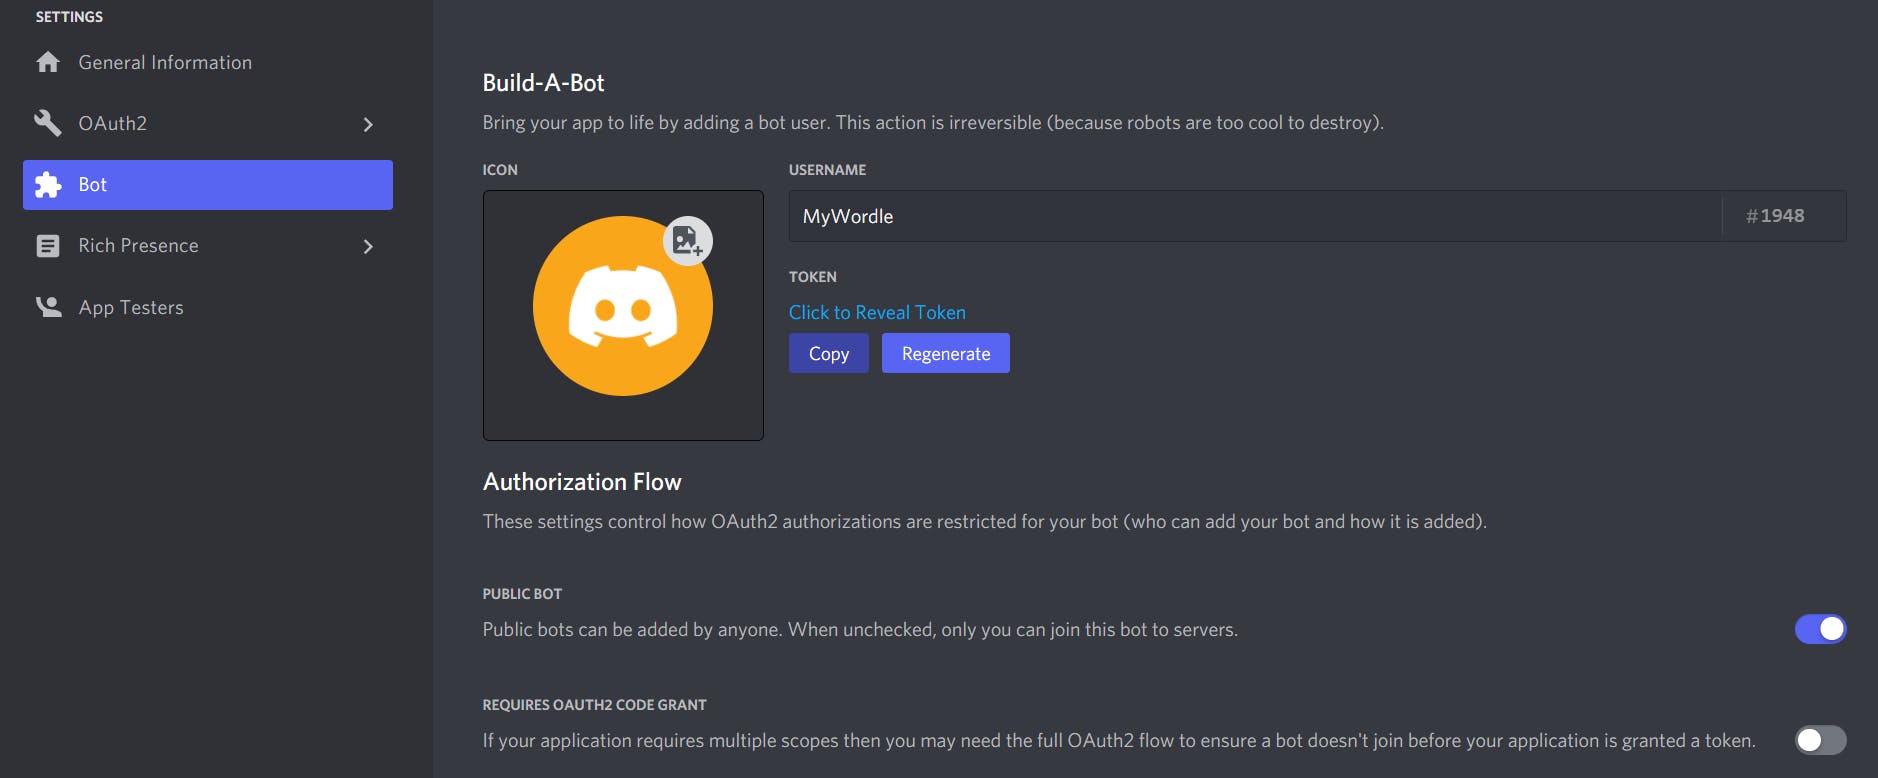
Tap on the copy button and paste it in your IDE or notepad. That's it. Now that you have your api-key and the bot token, let's create a .env file.
- Your .env file and your python code must be in the same folder. So wherver your .py file is, just create a new .env file and add these two lines in it.
TOKEN = "<Your Discord Token>"
APIKEY = <Your API Key>
- Save the file and that's it.
Importing the required packages.
If you don't have nextcord, requests, dotenv installed, then you can do it with just one simple command. In VS Code, ptress Ctrl+J. This will open a new terminal. Simply type
pip install nextcord

// let it install nextcord.

pip install requests

// let it install requests

pip install dotenv
After doing the above step. You can now create a new python file called as bot.py and import the dependencies.
import os
from dotenv import load_dotenv
import nextcord
import requests
from nextcord.ext import commands
- We import os because we will use environment variables to store our API Key and Discord Bot Id.
- nextcord is the library which we are using to make the bot
- requests is a python library which is used to make Http requests to an API.
Coding Our Bot
So till now, we have successfully imported our dependencies and created an env file.
This is how our working directory looks like for now.
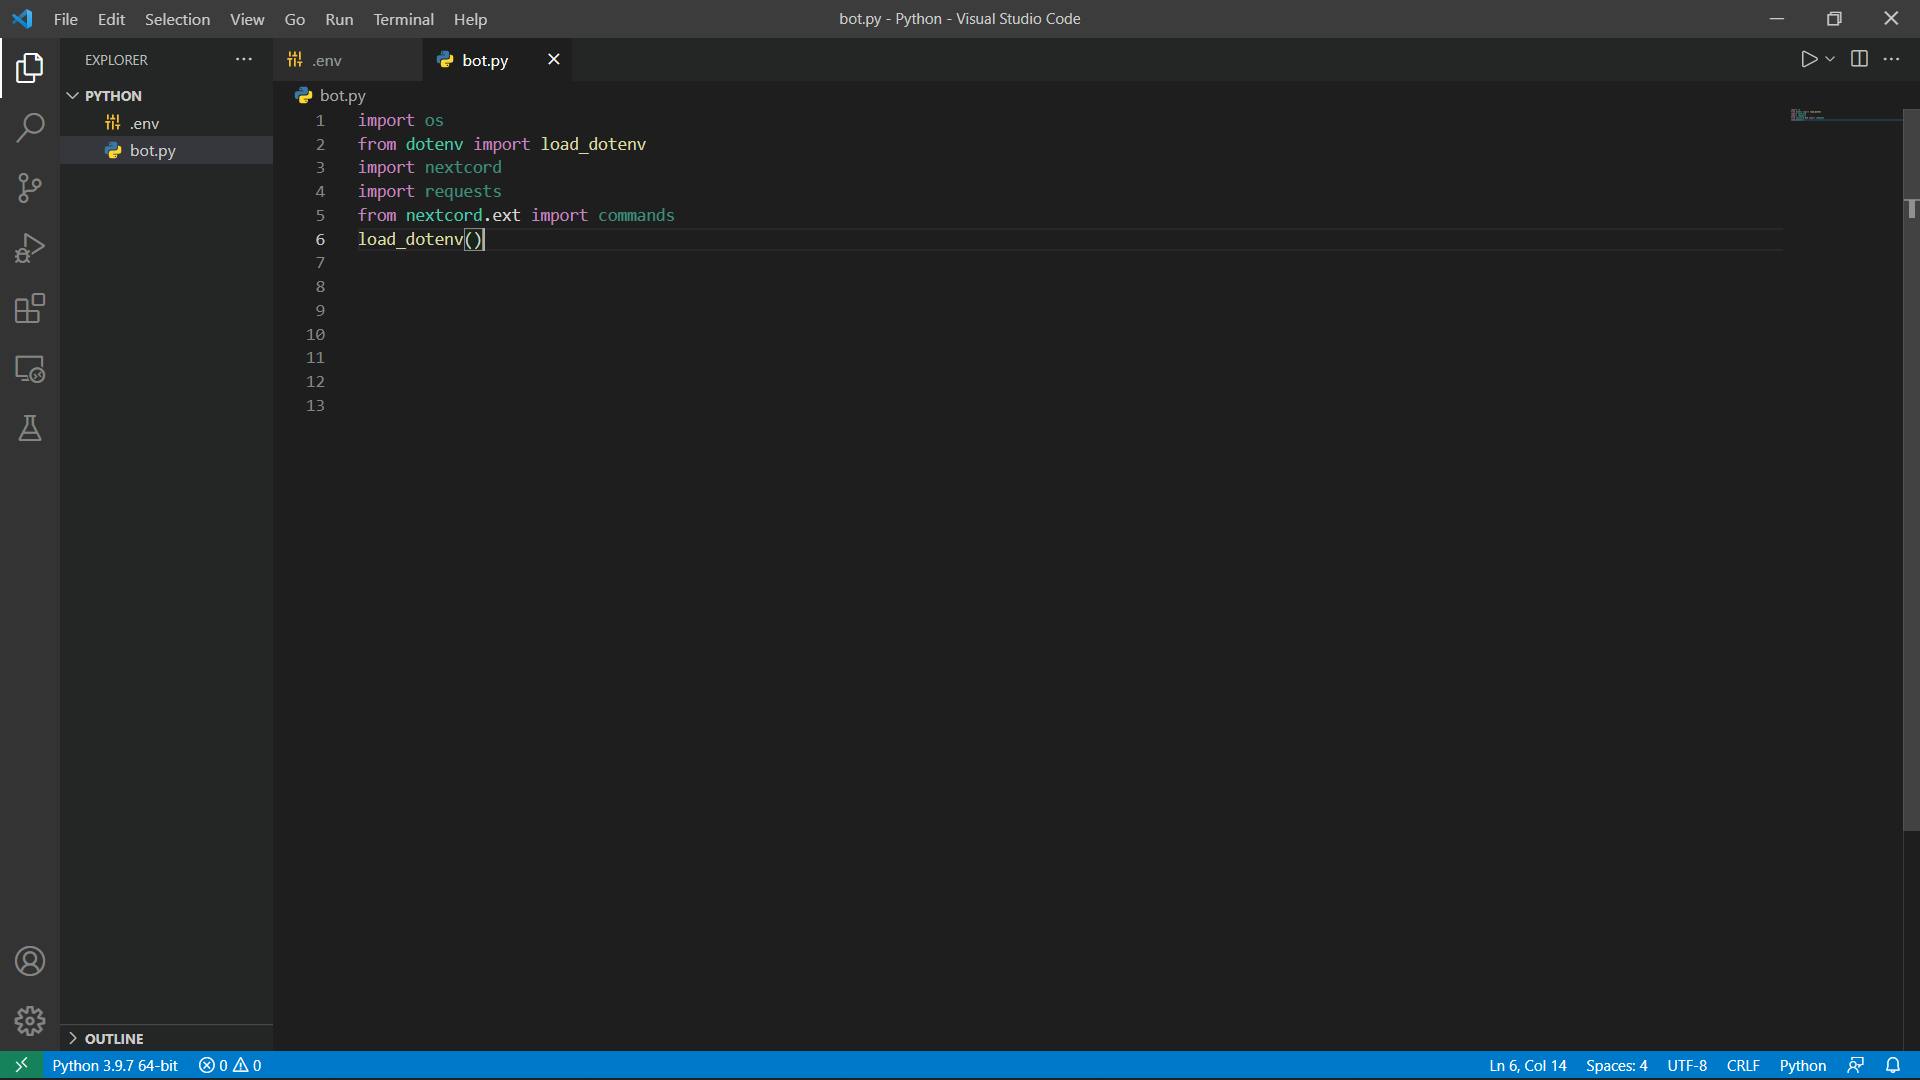
First of all let's create a bot and run it. We will do this with the help of commands. If you remember we have imported commands from nextcord library.
bot = commands.Bot(command_prefix="")  // creates a bot
bot.run(os.getenv("TOKEN"))    // runs the bot. os.getenv gets the variable named TOKEN which we used previously to store the Discord Bot Token.
Next, we will work on how the bot should react whenever it gets a / command.
@bot.slash_command(description="Get a DAD Joke", guild_ids=gID) // description is the message shown when you type / on the keyboard.

async def joke(interaction):
    await interaction.send(await on_message("joke"))
- joke is the function that executes when you send a /joke command on the server.
- interaction is like a stream. It contains details of the interaction that has started after the /joke command.
- guild_ids is a list of integers. Guild ID is your servers' id. You can get it by going on Discord, right clicking on your servers' icon and tapping the Copy ID button.
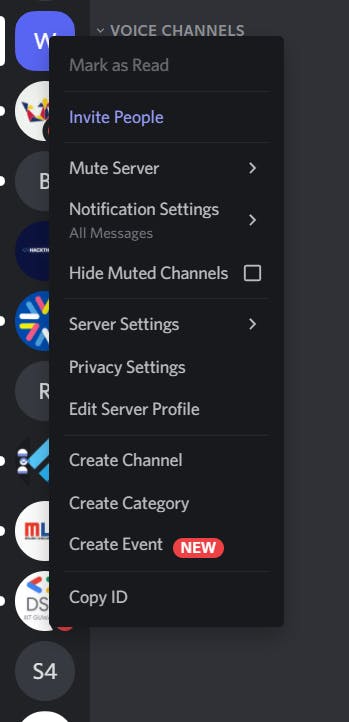
We will store this guild id in the .env file as well.
GUILD_IDS = <Your ID>
Now we will add some code to fetch this guild id in our bot.py file.
GUILD_IDS = os.getenv("GUILD_IDS")
gID = [int(GUILD_IDS)]
Now let's work on the function that fetches the data from API and gives us the joke.
- This is a simple API fetching function. We store the endpoint in a variable named url.
- We get our API key from our .env file and store it in a variable.
- We will need pass our api key in the headers. We don't need to send any body for this API Call.
- We store the response that we recieve in a variable named response. We then convert it into a json object.
- If you are having any difficulties, then this is how your fetched data will look like.
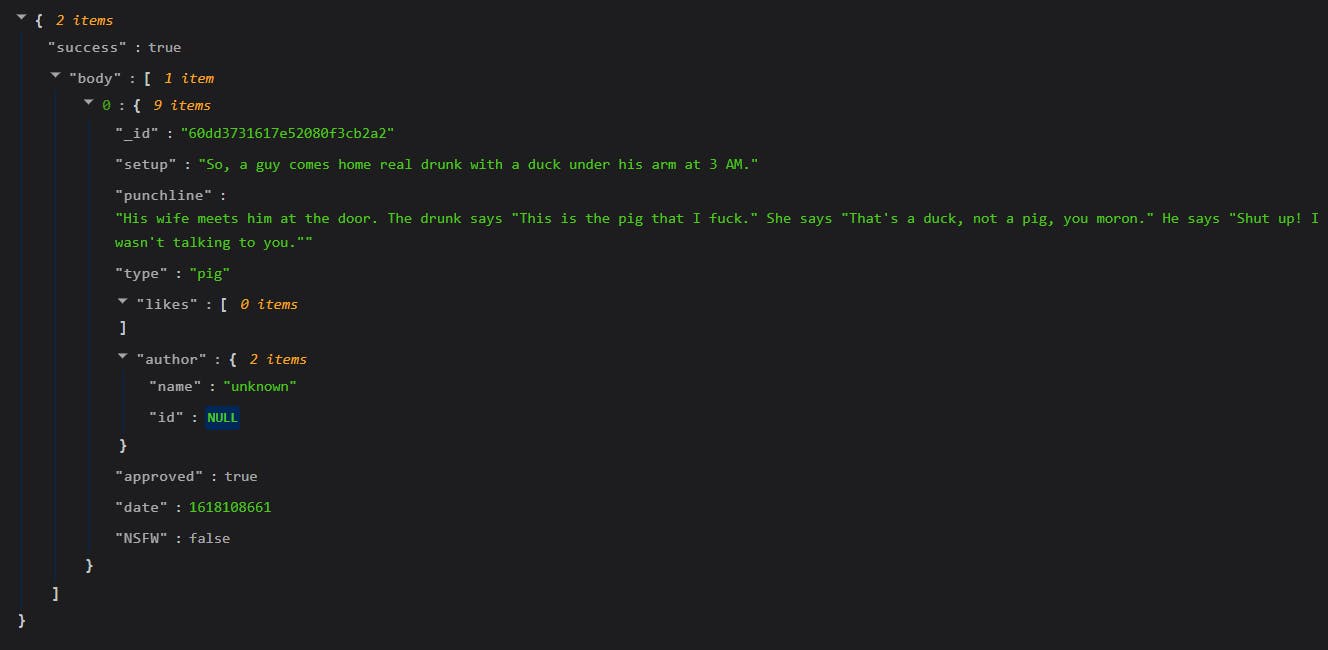
- Out of all the attributes, only the setup and the punchline matters to us. So we will access it using the [] operator.
- We will join our setup and punchline and return it as a single string.
- Here is the code for the same.
async def on_message(message:str):
    url = "https://dad-jokes.p.rapidapi.com/random/joke"  # url
    APIKEY = os.getenv("APIKEY")   # apikey
    headers = {
    'x-rapidapi-host': "dad-jokes.p.rapidapi.com",
    'x-rapidapi-key': APIKEY
    }

    response = requests.request("GET", url, headers=headers) # sending the request
 and storing it in response

    jokeData = response.json()   # converting to JSON

    joke1 = jokeData['body'][0]['setup']       # accessing the setup
    joke2 = jokeData['body'][0]['punchline']  # accessing the punchline of the joke
    joke = joke1 + '\n' + joke2
    return joke             # return the joke.
Testing Our Bot
- Now it is time to test out bot. For that, first run the bot.py file and head on to the server where you have created a bot.
- To run the bot.py file, use this command python bot.py in your integrated terminal
- Type the command /joke. The autocomplete will suggest you as you start typing though.

- Press the send button, wait for the response, and that's it. You have successfully created a discord bot using nextcord.

Conclusion.
Congratulations!! You have successfully created a Discord bot that runs on any server and sends you some funny Dad Jokes. The next step would be to host this bot on a server so that it runs forever. Currently, the bot will only be online when your python script is running.
We will see how we can host our Dad Jokes Bot in the next article. Well, if you are curious and eager you can try to do it by yourself too.
If you have any doubts or any errors related to the code that I have used above, feel free to comment and reach out to me.

