


Introduction 📕
If you make the user wait on the loading screen for a long time with a Circular progress indicator then chances are that he/she will just quit your app. You may have seen that in a lot of apps, the loading screen reflects the exact structure of the screen after the data is loaded on it. Something like this
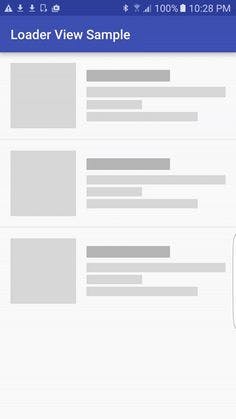
Today, we will see how to create this shimmer effect on the loading screen in a Flutter app. It is a very simple process. We will do it with the help of the shimmer package. So without wasting any time, let's get started.
Project Setup 💻
First of all, add the shimmer package to the pubspec.YAML file
dependencies:
  flutter:
    sdk: flutter

  cupertino_icons: ^1.0.2
  shimmer:
We are using a CircleAvatar to show an image in our example so I would recommend you to add an image in the assets folder and then add the assets in the pubspec file. You will have to create the assets folder in your root directory.
flutter:
  uses-material-design: true
  assets:
    - assets/ytlogo.png
Coding the Logic 🧑🏻💻
Our project setup is done. Let's start writing the code logic. We will divide the whole process into 3 simple steps
- Create the Shimmer widgets
- Create the widgets with data in it
- Show both of them one after another like a real app.
Step 1
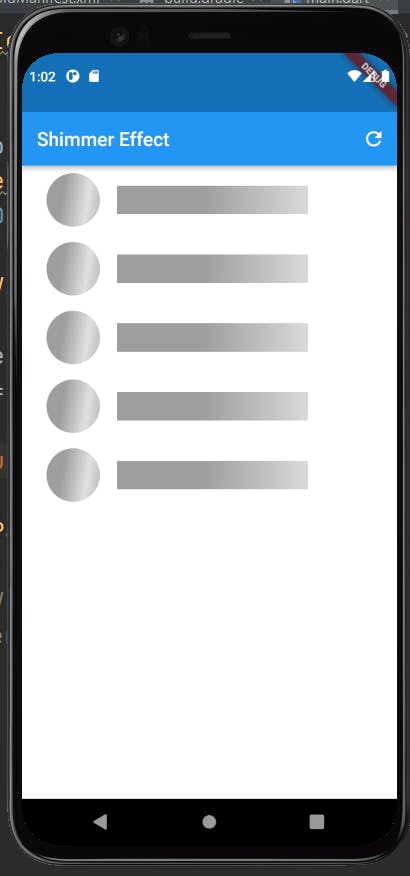
We will create a Listview. builder and then create 5 list tiles. In that, we will add a shimmer affect to our leading widget and the title widget.
It is very easy to add a shimmer effect. Just wrap your widget with Shimmer. from colors() widget and give it a base and highlight color. The code looks like this.
leading: Shimmer.fromColors(
child: const CircleAvatar(radius: 30,),
baseColor: Colors.grey,
highlightColor: Colors.grey.shade300
),
Let's do the same for the title widget and this is how our Listview looks after doing the same.
return Padding(
 padding: const EdgeInsets.all(8.0),
 child: ListTile(
   title: Shimmer.fromColors(
   baseColor: Colors.grey,
   highlightColor: Colors.grey.shade300),
   child: Align(
   alignment: Alignment.centerLeft,
   child: Container(
    width: 200,
    height: 30,
    color: Colors.white,
    ),
    ),
   leading: Shimmer.fromColors(
    baseColor: Colors.grey,
    highlightColor: Colors.grey.shade300),
    child: const CircleAvatar(radius: 30,),
     ),
  );
Here is the outcome of Step 1
In your main.dart or wherever you are coding the logic, import the shimmer package.
import 'package:shimmer/shimmer.dart';
Step 2
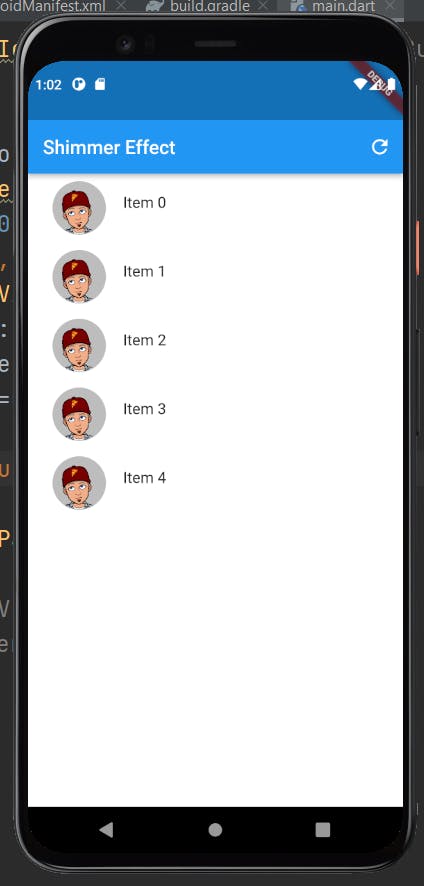
In this step, we will once again build 5 List-tiles but this time we will have some data in it and no shimmer effects. This is how it will look like
return Padding(
padding: const EdgeInsets.all(8.0),
child: ListTile(
title: Align(
alignment: Alignment.centerLeft,
child: Container(
width: 200,
height: 30,
color: Colors.white,
child: Text("Item $index"),
  ),
),
leading: const CircleAvatar(
radius: 30,
backgroundImage: AssetImage('assets/ytlogo.png',),
backgroundColor: Colors.black26,),
  ),
);
This is the outcome of the above code.
Step 3
In the third step, we will see how we can make the shimmer effect load first then after some delay, load our data. For that, we will create a boolean which tells Flutter if data is loaded or not. We also create a function loadData() and call it from initstate().
bool load=false;    // false means we will show our shimmer screen
void loadData()async
{
  await Future.delayed(Duration(seconds: 2));  // delay the data loading by 2 seconds
  setState(() {
    load=true;   // tells to show our loaded data.
  });
}
Now, we will call this loadData in our initstate. Whenever an app runs we show the shimmer screen for 2 seconds and then load the data.
We will also need to add a check in our listview. We will see if our load is true or false. If the load is false, we will show our shimmer widgets and if the load is true we will show data widgets.
ListView.builder(
itemCount: 5,
itemBuilder: (context, index) {
      if(load==true)
      {
          return DataListTiles();
      }
     else
      {
          return ShimmerListTiles()
      }
  }
),
DataListTiles() is the widget that we used in Step 2 and ShimmerListTiles() is the widget we used in step 3. Just replace these both with the ones in steps 2 and 3 and everything will work fine.
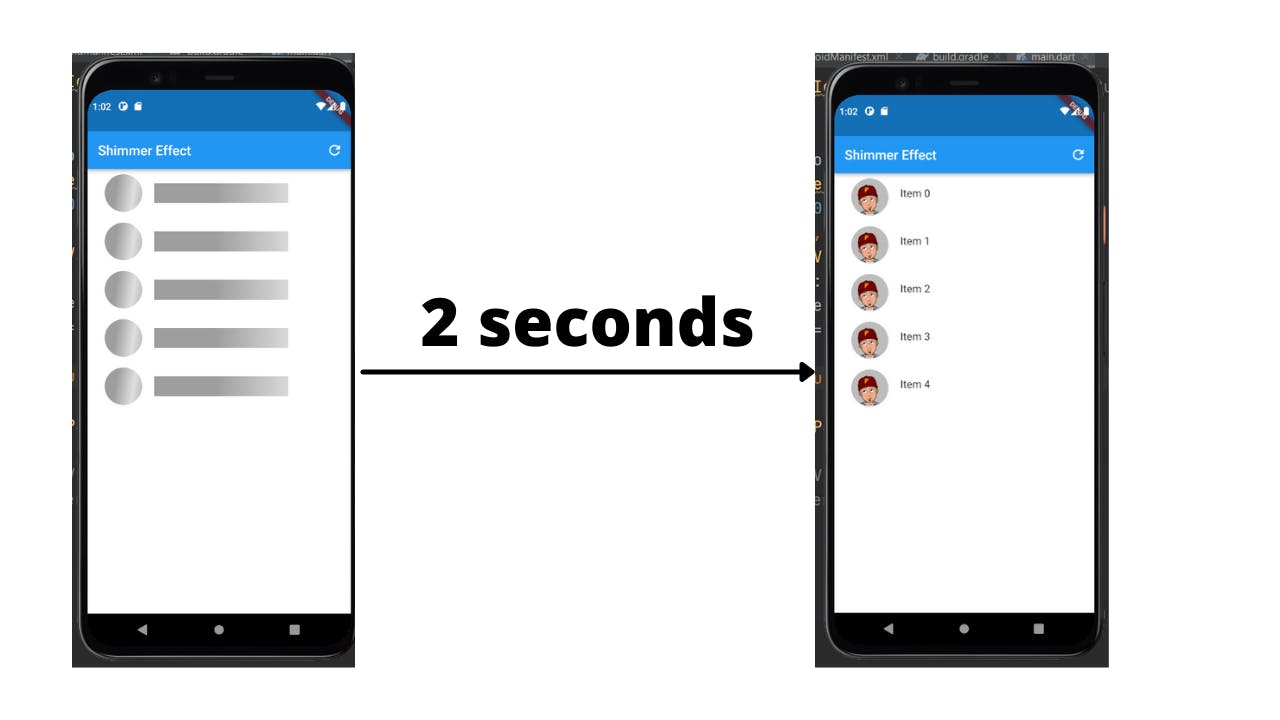
Hot restart your app and you will see a shimmering effect for 2 seconds and then the data will be rendered on the screen.
Step 4 (Optional 4)
Let's add a refresh button. This is completely optional though. Whenever you tap on the refresh button, you will see a shimmer effect for 2 seconds, and then data will get loaded again.
We will create this refresh button in our app bar. AppBar is an attribute of the Scaffold widget. Here is the code for it
appBar: AppBar(
  title: Text("Shimmer Effect"),
  actions: [
  IconButton(onPressed: (){
  setState(() {
    load=false;
  });
    loadData();
   },
  icon: Icon(Icons.refresh))
   ],
),
Hot restart your app. Now tap on the refresh button and see if you are able to see the shimmer effect for 2 seconds or not. If yes, then CONGRATULATIONS! You have successfully learned to create a Shimmer effect in your Flutter app.
Well obviously, the code isn't the cleanest. We can extract our widgets and reuse them again and again. The aim wasn't to teach extraction though. You can try extracting the widgets and making your codebase as clean as possible.
Also, go check out this article where I have discussed the 5 mistakes that you must avoid as a Flutter dev.
Conclusion 😄
With this, we conclude our tutorial on adding Shimmer effects in your Flutter app. I hope you learned something new today
You can appreciate and support my blogs by,

Let's connect on Twitter. Follow CSwithIyush for more amazing tutorials, tips/tricks on Flutter & DSA.