


Introduction
It has been a long time since I wrote anything. Well, I was busy learning new things and I will write about them soon but today I am going to pen down a complete step-by-step detailed walkthrough on how to build your own Flutter app.
We will see how to implement Authentication, connect an API to the app, do CRUD operations on a database, implement a QR code scanner, integrate Twilio notifications, and much more.
The app that I am going to build is DigiQ. It is a digital queue management system. This app has already won 2 hackathons so yeah it is indeed a "useful" project. You can follow the whole article and build the app along with me or you can only read the parts that you wish to learn. For example QR code scanner part or Twilio part.
All the parts are divided into different sections so it is extremely easy for you to follow. Without wasting any more time, let's get started.

Project Setup.
Let's start with creating a new Flutter project. You can name it anything you want. Next up we will clear the code present in main.dart file. Here is the list of dependencies that we are going to use in our project. So add it in advance in your pubspec file.
http: ^0.13.4
fluttertoast:
font_awesome_flutter: ^9.2.0
flutter_speed_dial: ^4.6.6
expansion_tile_card: ^2.0.0
google_fonts: ^2.1.0
qr_flutter: ^4.0.0
shared_preferences:
qr_code_scanner: ^0.6.1
pin_code_fields: ^7.3.0
auto_size_text: ^3.0.0
twilio_flutter:
With all this done, we are now ready to start working on our project.

Connecting Flutter with Flask API
The app that we are going to build today needs a custom API. We won't be using any third-party APIs. Talking about the custom API, I built an API using Flask which takes care of the backend. I can write a whole article about how the backend is built but that is not our concern now. In order to connect the mobile to Flask, we will make use of HTTP requests.

Authentication 🔒
There are two ways to implement the authentication feature. One is using Google sign-in with Firebase and the second is to make use of the custom API endpoint to sign-up and log in the users. If you want to know how to implement the Sign in with Google feature in a Flutter app, then go watch this video tutorial made by me.
Let's see how we can do authentication with our custom API.
Sign-Up
In order to create a new user, we will need some information like name, email, and password. Once taken, we will call our register endpoint and pass all the data to the backend. The backend will then take care of registering the new user and adding him/her to the database.
We will need 3 Textfields and 3 TextEditingControllers to accept the information provided by the user.
  TextEditingController mobile = TextEditingController();
  TextEditingController pass = TextEditingController();
  TextEditingController uName = TextEditingController();
We will wrap our 3 TextFields inside a Column which is wrapped inside a Form. We will also need a key for that form.
final formKey = GlobalKey<FormState>();
This is the code for the username Textfield
  TextFormField(
     controller: uName,
     textAlign: TextAlign.start,
     onChanged: (value) {
     userName=value;
    },
     validator: (value){
     return value!.length >4 ? null : 'Provide more than 4 characters';
   },
),
This one is for the phone number
TextFormField(
controller: phone,
keyboardType: TextInputType.phone,
textAlign: TextAlign.start,
onChanged: (value) {
  mobileNo=value;
},
validator: (value){
  return value!.length !=10  ? 'provide valid number': null;
 },
),
And the last one is for password
TextFormField(
                        controller: pass,
                        obscureText: true,
                        textAlign: TextAlign.start,
                        onChanged: (value) {
                          password=value;
                        },
                        validator: (value){
                          return value!.length >6 ? null : 'provide more than 6 characters';
                        }
                      ),
You can wrap these three text fields inside a column and the column inside the form. Voila, your signup screen is created. Now, we have to work on taking the logical aspect of this feature. We need to write a function that will call the API and return some results.
We will also need a RoundedButton which will have "Sign Up" written on it. When you tap on it, the whole process of signing a user in will begin. Here is the code for the button
RoundedButton(
  textColor: Colors.white,
  color: Color(0xffc1272d),
  title: 'Sign Up',
  onpressed:
),
Create a new function signInUser and add the following lines of code inside it.
signInUser()async
{
if(form.currentState.validate())
{
form.currentState.save();

ScaffoldMessenger.of(context).showSnackBar(
                                const SnackBar(content: Text('Please Wait')),

var result =  await a1.ApiSignUpdata(userName, password, mobileNo);
if(result!=0)
{
    Navigator.of(context).pushAndRemoveUntil(LoginScreen(), (Route<dynamic> route)
    => false);
}
}
}
What are these lines of code doing? Let's understand step by step.
The if statement checks if all the requirements for username, password, and phone number are met. We have defined the requirements in the validator attribute of a particular text field.
Once the check is done, we save the current state. Then we show a snack bar and ask the user to hang on till things are getting done in the backend. We make a call to our custom API (we will soon see the code for it) and store the message returned from the server in a variable called result.
If the result is not null, this means that the user has successfully logged in and hence we redirect the user to the login screen of our app. As you have noticed, I am not using the default routing method. I am using the remove until method. In this method, all the screens present in my route stack are removed and only the login screen is pushed inside.
Now on the onpressed attribute of the button, add this function signInUser().
Everything should work fine for now. The last step to complete our sign-up feature is to call the signup API. Let's see how we can do that.
Making API Call
First of all, we will create a new PostServices class. All the functions for post requests will be written inside this class. Inside the class, we will create a new function and add the following lines of code to it.
Future <dynamic> ApiSignUpdata(String username,String password,String phone) async {
    var url = 'https://digiline.azurewebsites.net/api/signup';  // API endpoint
    Uri uri = Uri.parse(url);
    var data = jsonEncode({
      "username":username,
      "password":password,
      "phone":phone,
    });
    var req = await http.post(uri,body: data);  // post request
    if(req.statusCode==201)  // if request is successfull
{
    SharedPreferences prefs = await SharedPreferences.getInstance();
    prefs.setString("name", username);
    prefs.setString("password", password);
    var result = jsonDecode(req.body);
    return result['message'];
}
  return 0;
  }
As you can see there is a lot of code. Let's break it down. First up we are converting the string into URI. The URL is the API endpoint we will be hitting. Next up we make a map of the data that has to be sent to the server and store it in a variable called data.
We then make use of the post method of the HTTP class. We pass the URL and the body to the server. Things happen in the backend and then we get a response from the server. If everything is fine, we will get a status code 201 or 200. If something is wrong, we will get the status code and the message accordingly.
You can see that we are using Shared Preferences. We are doing it so that the user stays logged in even when he/she closes the app after signing up.
With this, we complete our Signup feature. If you copy-paste the code I have given till now and try to register a new user, it should work fine.
Log In
The login feature is not much different from the Signup feature. The only difference is the data that we take and pass to the server. Here is the code for the function that calls the server to sign in the user.
Future <dynamic> ApiLogIn(String username,String password) async {
    var url = 'https://digiline.azurewebsites.net/api/login';
    Uri uri = Uri.parse(url);
    var data = jsonEncode({
      "username": username,
      "password":password
    });
    var req = await http.post(uri,body: data);
    if(req.statusCode==200) {
      SharedPreferences prefs = await SharedPreferences.getInstance();
      prefs.setString("name", username);
      print(req.statusCode);
      print(req.body);
      var result = jsonDecode(req.body);
      return result['message'];
    }
  }
As you can see, we are not asking for the phone number while logging in. In the UI part, we will just remove the text field for phone number and replace sign-up with login text on the screen. We will also need to change the redirection. Once the user successfully logs in, we would want him/her to go to the home page. To do that, replace the Navigator.pushUntil... line with this line
Navigator.of(context).pushNamedAndRemoveUntil(AllQueues(), (Route<dynamic> route) => false);
That's it. You have a working login and signup page now for our app. This code template can be used for any of your projects and not specifically for this app. You will just need to change the API endpoint and add or remove the text fields according to your need.
QR Code Features 🧑🏻💻
QR Code scanner is used in the app to scan and join queues. I have also implemented a QR Code generator feature. We will see how you can add both of these features to your app.
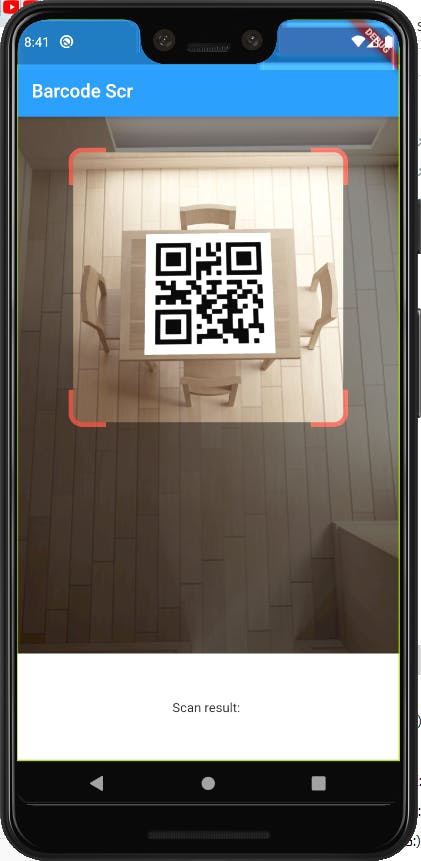
QR Code Scanner
We will use the qr_code scanner package. First of all, we create a QRView widget that comes in the package. We provide a key and an on view created to this widget. The onViewCreated is basically about what to do once the QR code is scanned.
We want to make an API call to get the info of the queue and give the user the option to join the queue once the QR code is successfully scanned. So to do that, we write this piece of code.
  controller.scannedDataStream.listen((scanData)async {
      controller.pauseCamera();
      result = scanData;
      SingleQueue res= await getData(result!.code.toString());
}
The above piece of code gets us the info of the queue whose QR code has been scanned. getData function is a function to call the API to get details of the queue. SingleQueue is an object model that I have created to convert the JSON data.
You can easily convert JSON data to a class using app.quicktype.io. Once we get the details of the queue, we show the user the details of the queue and ask if he/she wants to join.
RoundedButton(color: Colors.black,
 title: "Join Queue",
 onpressed: () async{
 ScaffoldMessenger.of(context).showSnackBar(
   const SnackBar(content: Text('Please Wait')),
  );
  var joinResult = await p1.ApiJoinLine("", res.id);
  Fluttertoast.showToast(msg: joinResult);
  Navigator.of(context).pushNamedAndRemoveUntil('/allqueues', (Route<dynamic>
  route) => false);
},
textColor: Colors.white)
The above code is only for the button to join the line. You can create your own UI which shows details of the queue.
Here is the code which calls the API endpoint to join a queue.
  Future <dynamic> ApiJoinLine (String username,String qId)async {
    SharedPreferences prefs = await SharedPreferences.getInstance();
    String? usname = prefs.getString("name");
    var url = 'https://digiline.azurewebsites.net/api/joinqueue';
    Uri uri = Uri.parse(url);
    var data= jsonEncode({
      'username':usname,
      'queueId': qId,
    });
    var req =await http.post(uri,body: data);
    print(req.statusCode);
    print(req.body);
    var result = jsonDecode(req.body);
    return result['message'];
  }
You can see we are fetching the username from our shared preferences because we need to send that to the server. We need to validate the user. Only a valid user can join the line hence we are passing it in the body. Rest everything is the same.
QR Code Generator.
This feature is to create a unique QR code for every new line that has been created. The user is asked to enter some details of the queue he wants to make and then we generate a unique queue id and a unique QR code that can be scanned to join the queue.
We will create a form that has multiple text fields. We will ask for the queue name, city name, and estimated time per user. We will then generate a new qr code once the user has entered all the information.
I will just show the code to generate a new QR code. Create the Text fields and the form by yourself. You already know how to do it.
We create a variable that tells us if the form is fully filled or not. Once the form is filled and the user presses create queue button, we toggle the variable to true and then display the QR code. The QR code will contain data. The data will be the unique queue id.
We get the queue id from the backend. We send a request that the user has requested to create a new queue with these details. In response, we get a unique queue id and that id is used by us on the frontend inside the QR code.
isQrActive?Center(
 child: Column(
 children: [
 SizedBox(height: 10,),

// qr image widget comes with the qr_flutter package
 QrImage(
 data: lineNumber,
 version: QrVersions.auto,
  size: 200.0,
  ),
 SizedBox(height: 5,),
  Text("Scan this QR Code to Join the Queue. Queue Id #: ${lineNumber}",),
   SizedBox(height: 5,),
    RaisedButton(
    color: Colors.black,
    onPressed: (){
    Navigator.push(context, MyQueues);
    },
   child: Text("View My Queues",style: textStyles.copyWith(color: Colors.white),),
  )
 ],
),
):Container(),
The above code is the UI for our QR code. You can copy-paste the code as it is.
lineNumber = await p1.createLine('x2', qname.text, int.parse(tpuser.text), location.text);
This is the piece of code where we create the line and get a unique queue id from the backend. Add this line of code in the onPressed attribute of your button.
Here is the code which calls the API to create a new line
Future<dynamic> createLine(String userName, String name, int time, String city, String tag)async{
    String url = "https://digiline.azurewebsites.net/api/createqueue";
    SharedPreferences prefs = await SharedPreferences.getInstance();
    String? usname = prefs.getString("name");
    var data = jsonEncode({
      "username":usname,
      "name":name,
      "time":time,
      "city":city,
    });
    Uri uri = Uri.parse(url);
    var req = await http.post(uri,body:data);
    print(req.statusCode);
    print(req.body);
    if(req.statusCode==201) {
      var jsonData = jsonDecode(req.body);
      return jsonData["queueId"];
    }
    return false;
  }
Well, if you made it this far in the article, then

Queue Management [Data Fetching] 📅
In this part, we will see how you can fetch data from API and display it in your app. We will call the get queues API and fetch a list of all the active queues. We will make a class model of the data that we are receiving and then use the Future builder to show the data. Making a model of JSON data is important as it helps in preventing null check errors and it is considered a good practice.
First, let's see the function which calls the get active queues API. Create a class called GetServices and then add the below function inside it.
Future<List<AllLines>> getAllLines()async{
 String url = "https://digiline.azurewebsites.net/api/getallqueues";
 Uri uri = Uri.parse(url);
 var req = await http.get(uri);
 print(req.statusCode);
 print(req.body);
 var jsonData = jsonDecode(req.body);
 List<AllLines> allLinesFromJson(String str) =>
 List<AllLines>.from(json.decode(str).map((x) => AllLines.fromJson(x)));
    return allLinesFromJson(req.body);
  }
You can use Postman to see the response and then copy-paste the response on app.quicktype.io to get a Dart model class.
Moving on to the UI part, you can make the UI as you wish just make sure that you have wrapped it under the Future Builder.
GetServices g1 = GetServices()

----- Some Flutter code------

FutureBuilder<List<AllLines>>(
 future: g1.getAllLines(),
 builder: (context,snapshot){
     if(snapshot.connectionState == ConnectionState.done())
     {
              if(snapshot.hasData)
             {
                  return YourWidget(),
             }
             return Text("No Queues Found")
      }
      return CircularProgressIndicator(),
  }
)
Just like all queues, you can get the list of all the queues that you have joined or have created. Everything remains the same except the API endpoint that you are calling.
Here is the code for calling my joined queues API
  Future<dynamic> getJoinedLines()async{
   String url = "https://shubbhuprasu.azurewebsites.net/getAll";
   Uri uri = Uri.parse(url);
   var req = await http.get(uri);
   print(req.statusCode);
   print(req.body);
   if(req.statusCode==200) {
    return jsonDecode(req.body);
  }
    return "No Data Found";
 }
Twilio Integration ✉️
 I have written an article on how you can integrate Twilio with your Flutter app. I have discussed the prerequisites to add Twilio to your app. So here, I will just share the code of the Twilio integration part. Check out this article for a detailed guide.
class TwilioService
{
  late TwilioFlutter twilioFlutter;
  void setAccount(){
    twilioFlutter = TwilioFlutter(accountSid: "<Your id>", authToken: "<Your token>", twilioNumber: "<your twilio number>");
  }
  void verifyPhoneNumber(){

  }
  void sendSms(int z, String idline, String idName)async{

      await twilioFlutter.sendSMS(toNumber: "<phone number>",
          messageBody: "Hey There, you are the leader of the queue #${idline}, ${idName}");
  }
}
Miscellaneous Features 📞
There are a few more features that I have added to the app like making phone calls directly from the app. For that, I have used the url_launcher package. It allows making phone calls from your Flutter app. It will redirect you to the phone app with the phone number pasted on the dial-pad. Check out this article for a detailed guide.
Adding App Icon
Once you are done with adding all the basic features to the queue management app, it is time to generate an app icon. Earlier, adding an app icon was a hectic task but the flutter_launcher_icons package has made it so much easier to add app icons.
First of all import the package.
dev_dependencies:
  flutter_launcher_icons: "^0.9.2"
Add this piece of code below the dev_dependencies part of your pubspec file
flutter_icons:
  android: "launcher_icon"
  ios: true
  image_path: "assets/icon/icon.png"
The code is self-explanatory. Now, in the terminal of your Android Studio or VS Code, run the following command
flutter pub get
flutter pub run flutter_launcher_icons:main
It will take a minute or two to run and then voila! A new app icon has been added to your Flutter app.
Conclusion 👋🏻
Well, that's it. If you followed this article then you would have learned the basics of
- Fetching Data from Custom API
- Adding a QR Code Scanner and Generator to your app
- Building UI for Sign-In/ Login
- Sending Data to the database via API
- Integrating Twilio
- Adding App Icon
All these small topics weren't explored in much more detail but I have a basic gist about them. I have written tons of detailed articles on a single topic. Make sure to check it out on my blog.
It was indeed a long article. Kudos if you kept reading. I hope you learned something new today!

You can appreciate and support my blogs via.

Also, let's connect on Twitter. Follow CSwithIyush for more amazing tutorials, tips/tricks on Flutter & DSA.